
Hello, everyone. In our previous post, we introduced Azure AD, covering licenses and also a comparison between Azure AD and Windows Server-based Active Directory. If you haven’t read it yet, click this link. In today’s article, we’ll explain what Azure Role-based Access Control (RBAC) is, what it’s used for, how to customize roles, and how to assign roles to a user using the portal and PowerShell.
What is Azure RBAC?
Azure RBAC is a role-based access control system that allows you to grant a user the access they need based on the role they hold within the company.
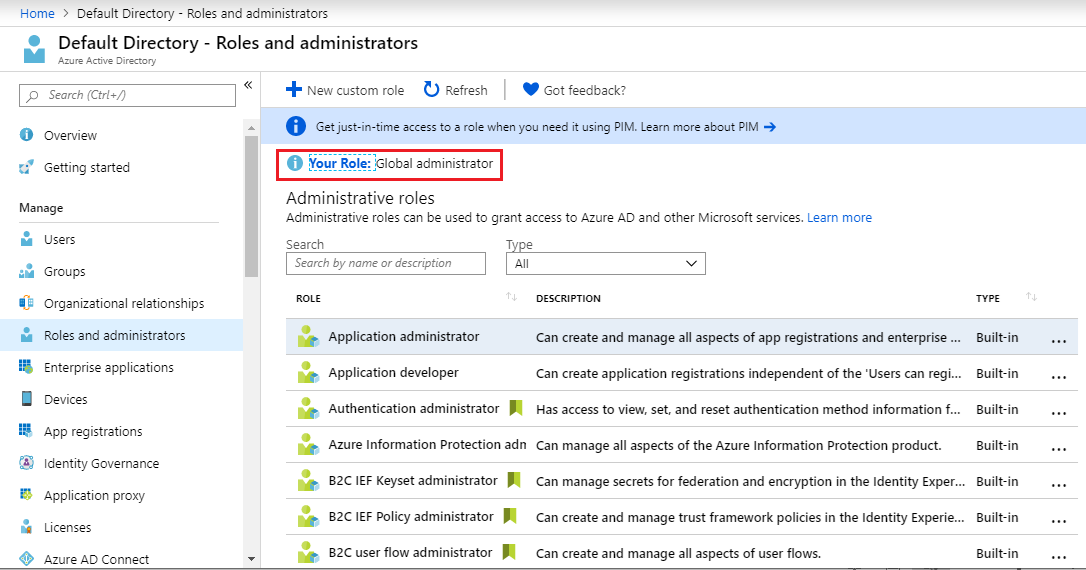
How do I identify my role in Azure?
In the Azure portal, sign in with your credential and go to the Azure AD > Roles and Administrators menu. You’ll see your role as shown below:
 What are the types of RBAC?
Azure has (default) roles, but you can also customize them according to the company’s needs. You can create a role completely from scratch or customize one using the Azure portal.
How do I create a custom access?
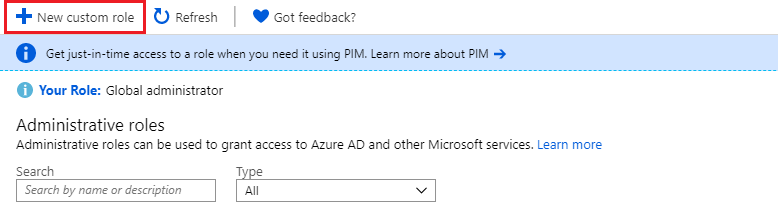
To create a custom access using the Azure portal, go to the Azure AD > Roles and Administrators menu and select the New custom role option.
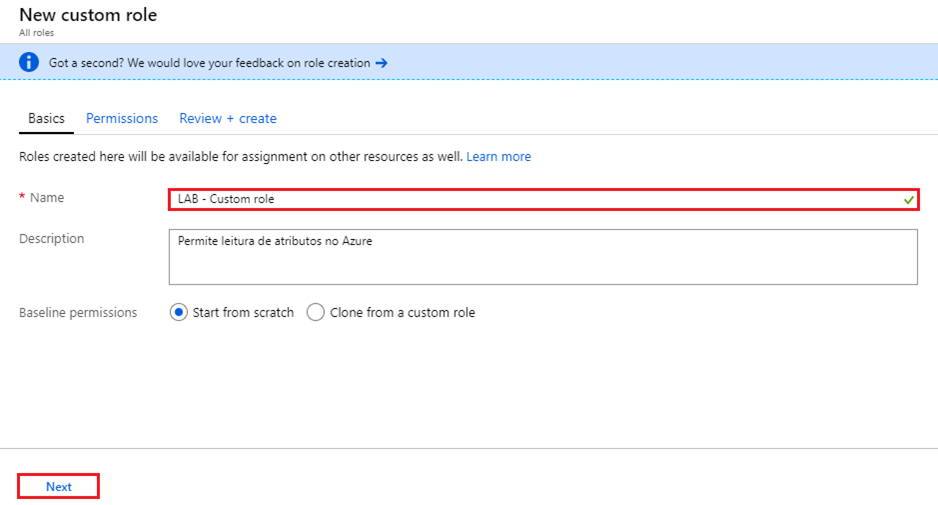
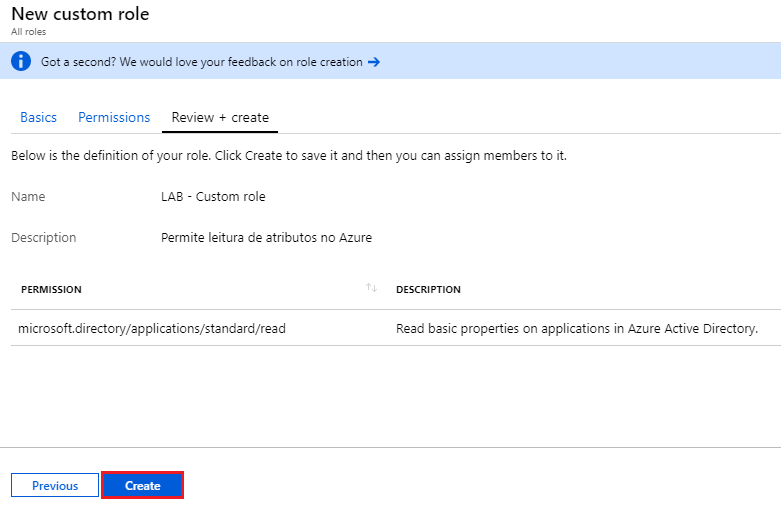
 Enter the role name and, optionally, a description.
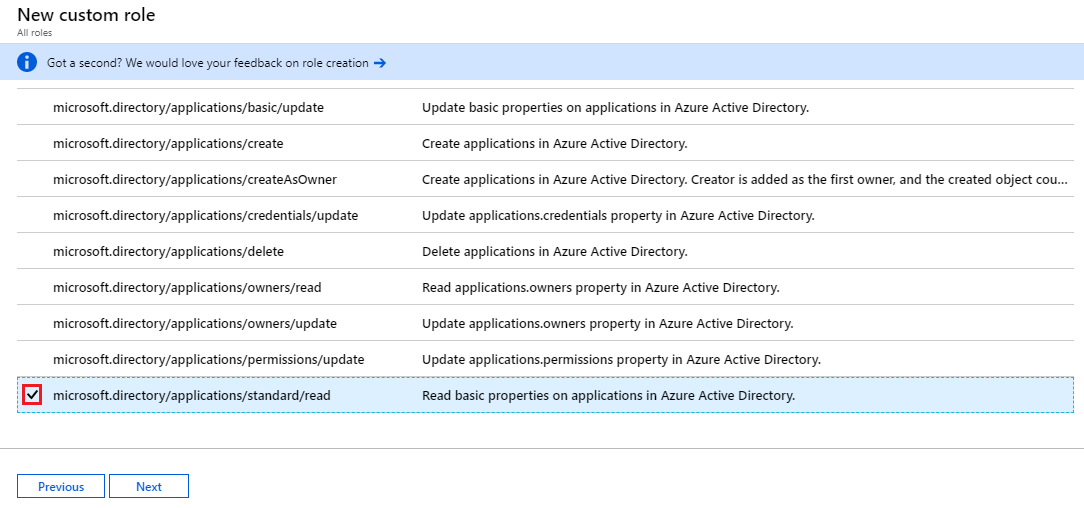
 In our custom role, we’ll select only read access to applications in Azure AD.
Click Next.
 On the Review + Create tab, review the configured options and click Create.
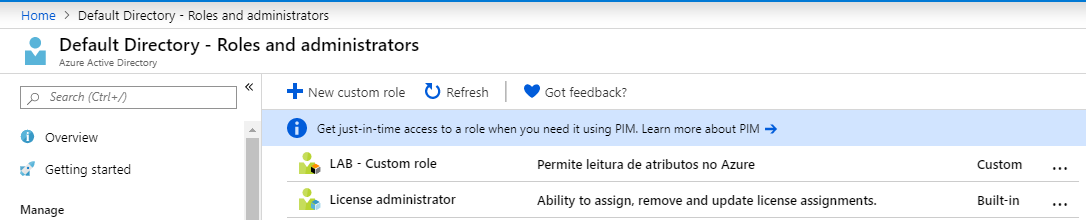
 With the role created, you can tell the difference between a default role and a custom one through the icon or the Type column. These options let you identify which roles were created by an administrator in Azure.
 Assigning Roles in Azure
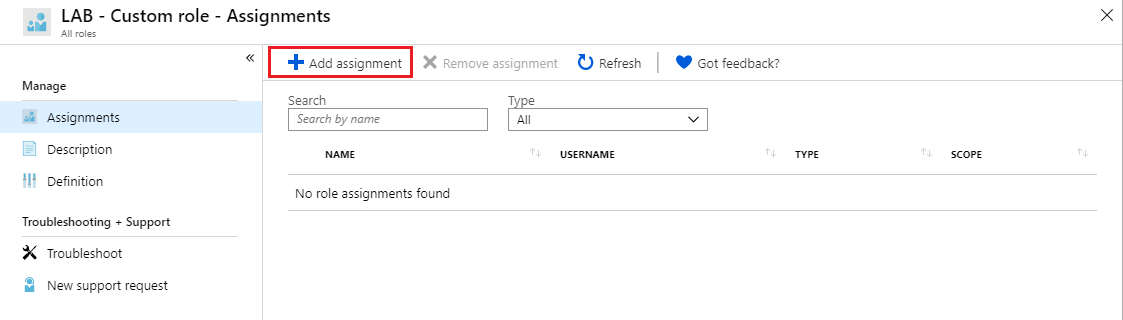
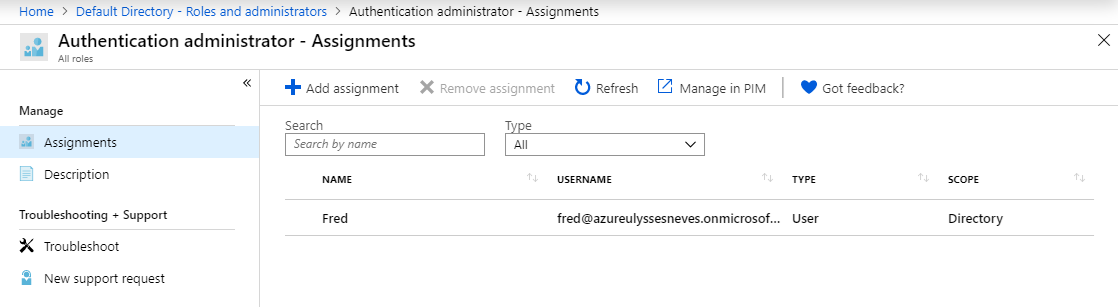
With the role created, let’s assign it to an existing user. In the Azure AD > Roles and Administrators menu, select the role you want to assign to a user. In this view, you can see which assignments exist for the selected role.
Click Add assignment to assign a user to the selected role.
 Select a user and click Add.
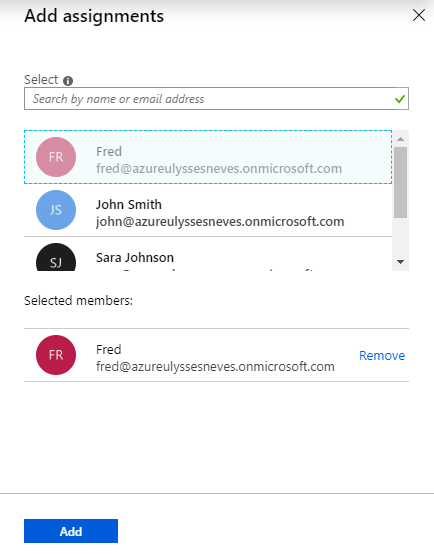
In the screen below, you can see user Fred’s access assigned to the custom role for the default directory.
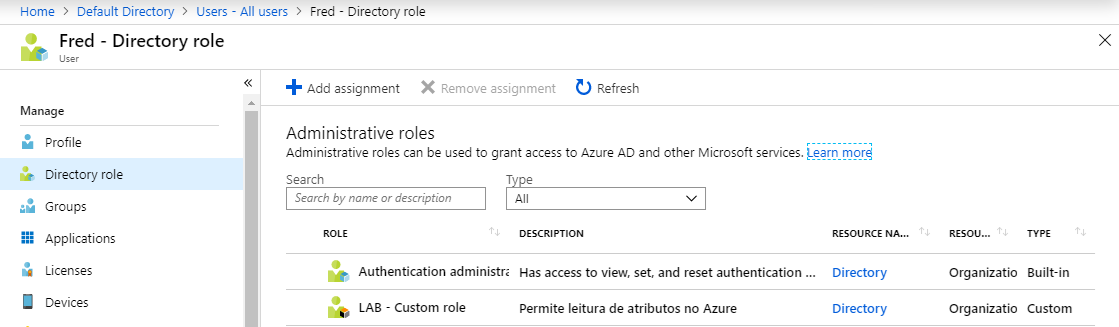
 You can also identify which roles are assigned to a user through the menu Azure AD > All Users > select the user you want information about and click the Directory role option.
 Creating a Custom Role Using PowerShell
Let’s now create a custom role based on a default Azure role using PowerShell, by customizing a .json file.
Let’s connect to Azure using PowerShell. If you don’t know how to connect to Azure, take a look at the article where I show how to configure the PowerShell module for Azure through this link.
Let’s run the command below and export the “Monitoring Contributor” role so we can edit it:
Get-AzRoleDefinition -Name "Monitoring Contributor" | ConvertTo-Json | Out-File C:\windows\temp\MonitoringContributorRole.json

Open the .json file with a code editor. If you don’t have one, I recommend Visual Studio Code, which is free and can be downloaded from this link.

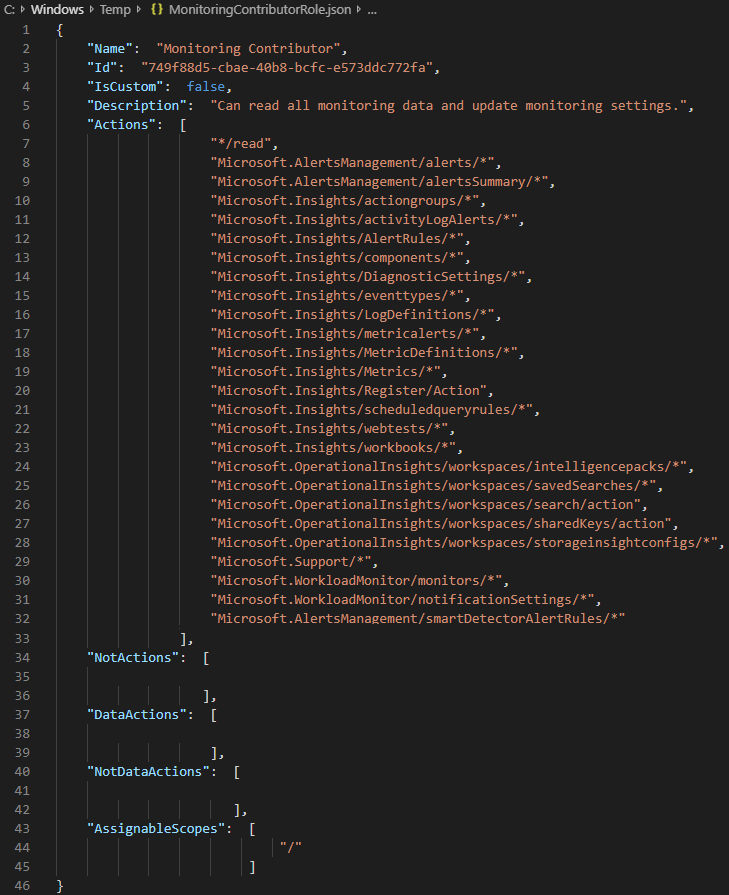
Let’s edit the “Name”, “IsCustom”, “Description”, and “AssignableScopes” fields.


Save the .json document.
Let’s now create a custom role by importing the file we just edited.
New-AzRoleDefinition -InputFile "C:\windows\temp\MonitoringContributorRole.json"

Let’s list the existing custom roles using the command below:
Get-AzRoleDefinition | ? {$_.IsCustom -eq $true} | FT Name, IsCustom

Summary
In today’s post, we talked about Azure RBAC, how to assign access permissions in Azure with RBAC through the portal and using PowerShell.
In the next article, we’ll talk about custom domains and directories in Azure.
I hope this content has contributed to expanding your knowledge of Azure.
Did you like the post? Like and share it.
If you have any suggestions or comments, let us know.
[ ]’s
Ulysses Neves
