
Hello, everyone. In today’s article, we’ll explain step by step how to configure a federated environment with AD FS for joining devices from a local domain to Microsoft Entra ID.
As explained in the article Introduction to Device Management in Microsoft Entra ID, the hybrid scenario uses the best that on-premises AD and Microsoft Entra ID can offer in management tools and security solutions.
Configuring Automatic Registration in Microsoft Entra ID
Note: To follow the steps below, you need to have at least one AD FS server configured in the environment and Microsoft Entra Connect configured in federated mode with AD FS. If you don’t yet have a domain with AD FS, follow the steps in this link.
If you have a domain with AD FS installed and Microsoft Entra Connect configured in federated authentication mode, follow the steps below to set up the environment to configure hybrid device registration.
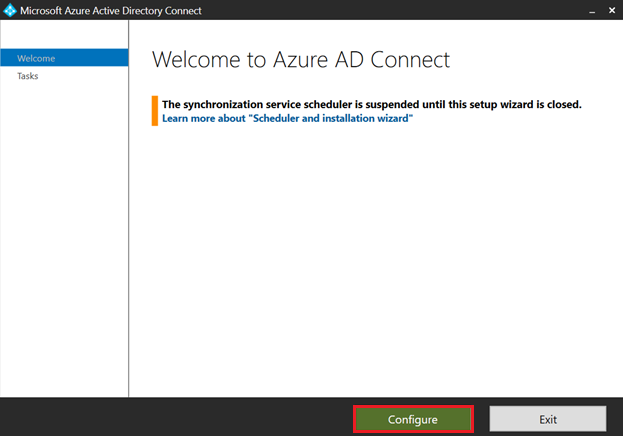
On the SYNC server, open Microsoft Entra Connect and click Configure.
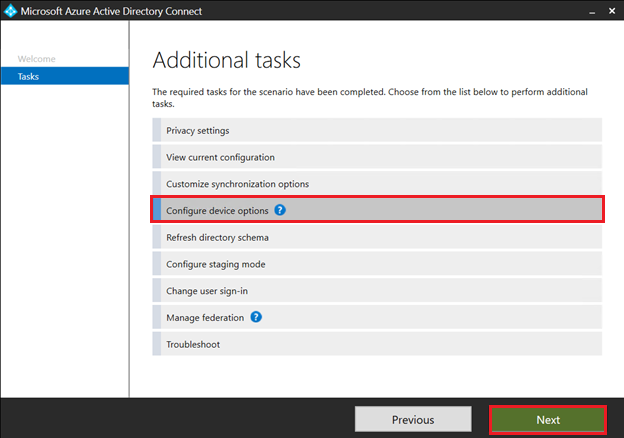
Select the Configure device options menu.
Click Next.
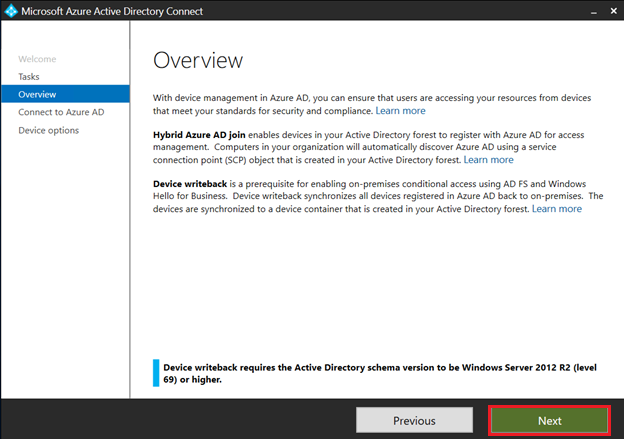
Click Next.
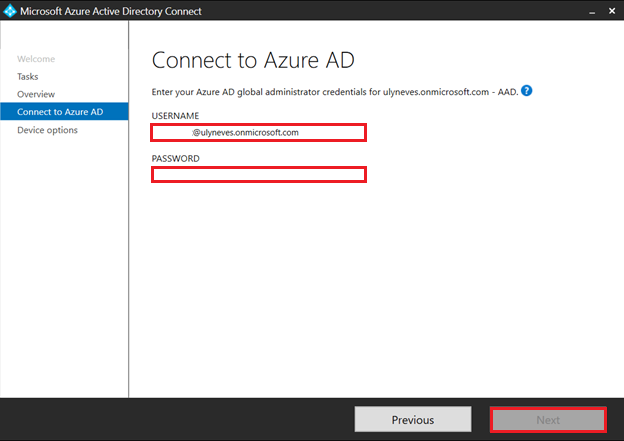
Enter the credentials of a user with Global administrator privilege and the password.
Click Next.
Select the Configure Hybrid Azure AD join option.
Click Next.
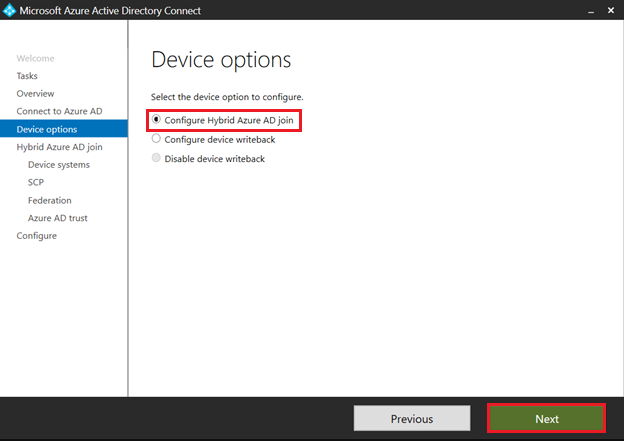
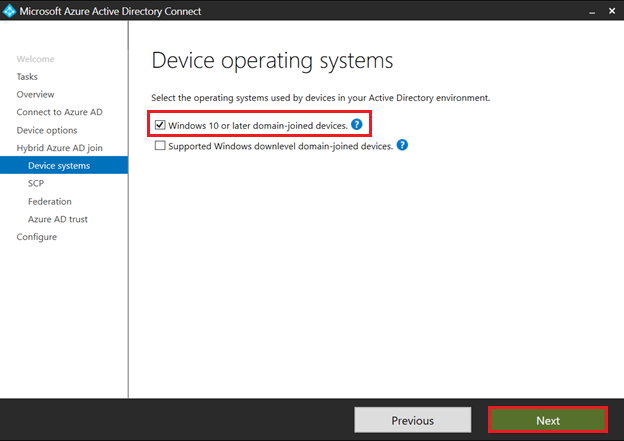
Select the Windows 10 or later domain-joined devices option.
Note: If you have devices running a version earlier than Windows 10, select the Supported Windows downlevel domain-joined devices option.
Click Next.
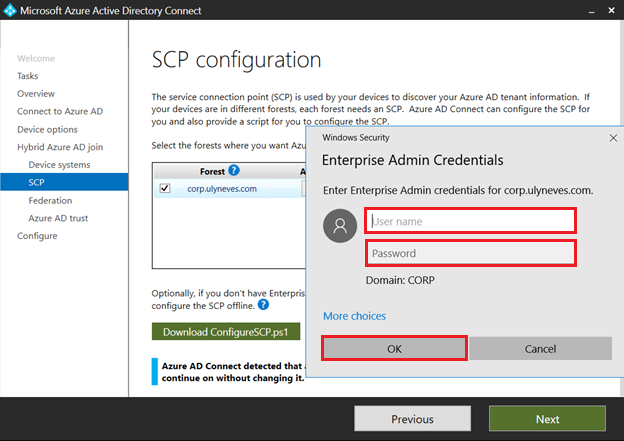
Select the local domain you want to configure and enter credentials that have Enterprise Admin privilege.
Click OK and Next.
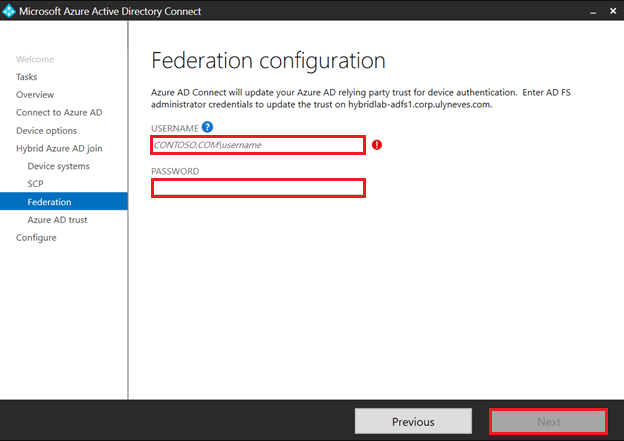
Enter the credential that has administrator privilege on the AD FS service.
Click Next.
Click Exit.
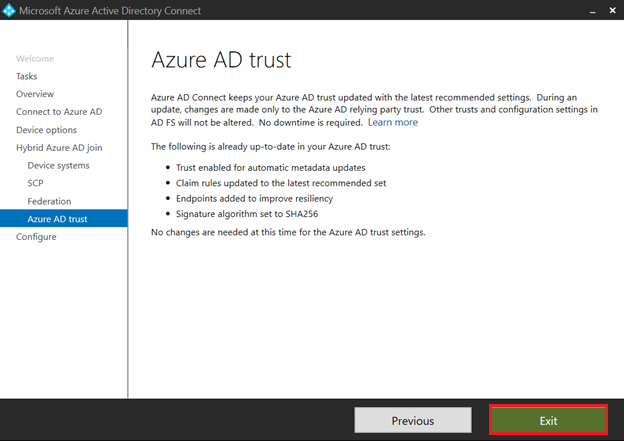
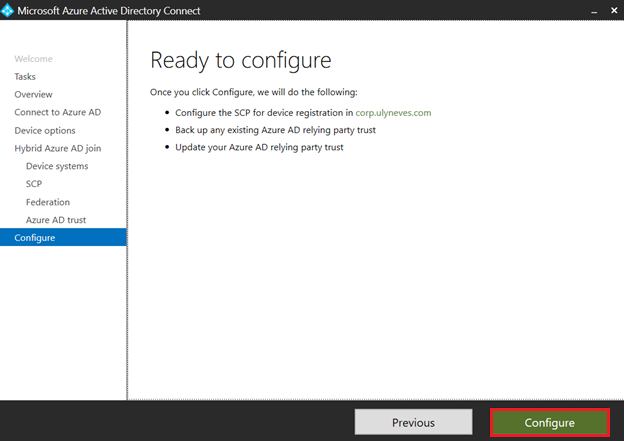
Click Configure.
Click Exit.
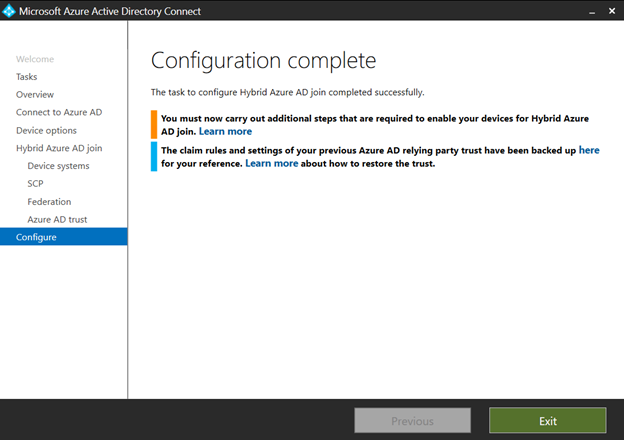
Note: After configuring hybrid device registration, there are some additional configurations to perform for a controlled rollout using GPO that we won’t cover in this article. For more information, access this link.
Enabling Device Authentication on AD FS
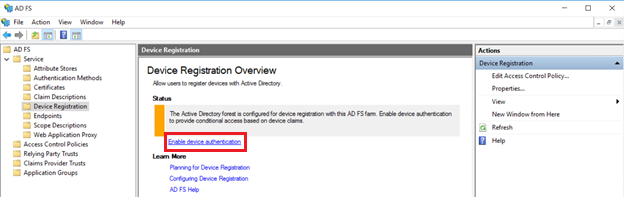
On the AD FS server, open the service manager and select Device Registration.
Click Enable device authentication.
Validating the SCP (Service Connection Point) Configuration
You can confirm whether the settings made by Microsoft Entra Connect in the previous steps are correct using ADSI Edit. Open the tool and navigate to CN=62a0ff2e-97b9-4513-943f-0d221bd30080,CN=Device Registration Configuration,CN=Services, [your domain], as shown below:
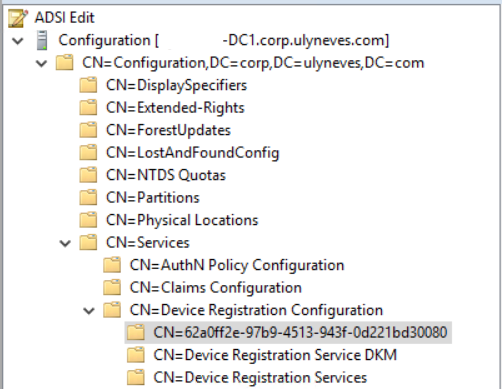
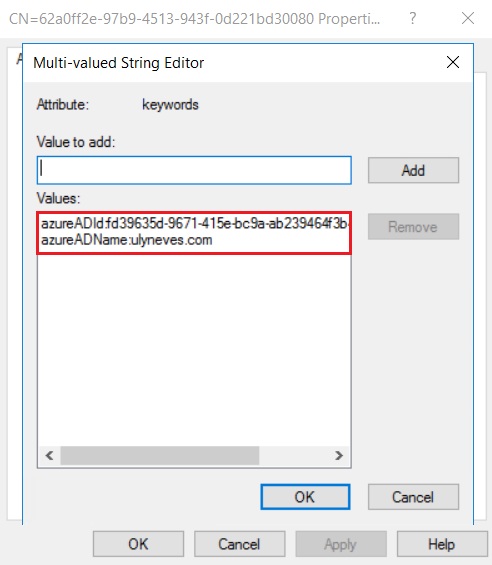
Right-click the 62a0ff2e-97b9-4513-943f-0d221bd30080 directory and you’ll be able to see the available SCP domain records.
Joining a Windows 10 Device to the Local AD (Microsoft Entra Hybrid Join)
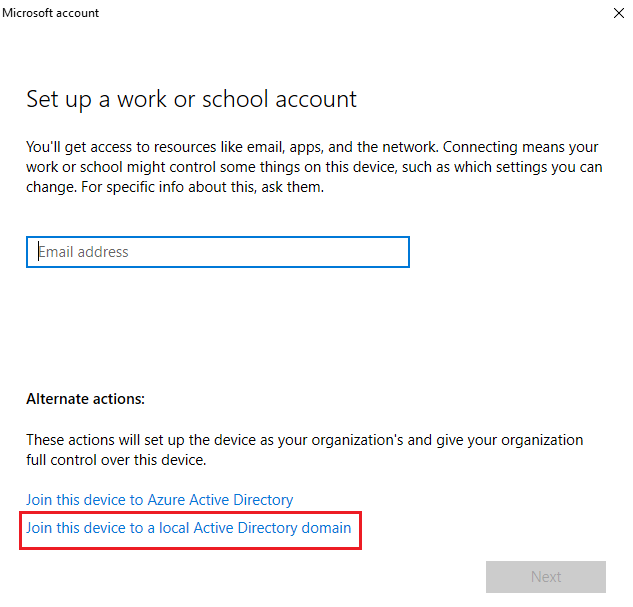
Now let’s join a Windows 10 device to a local domain.
Select the Join this device to a local Active Directory domain option.
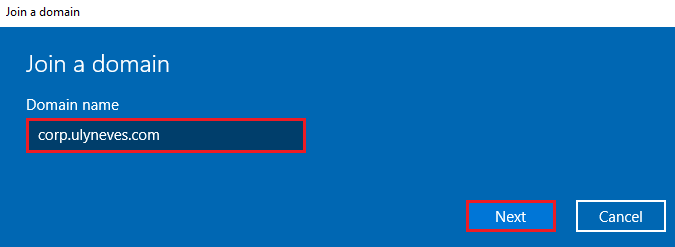
Enter the information for the local domain you want to join the device to, and click Next.
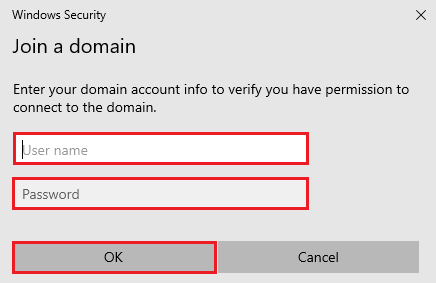
Enter credentials that have permission to join devices to the local domain, and click OK.
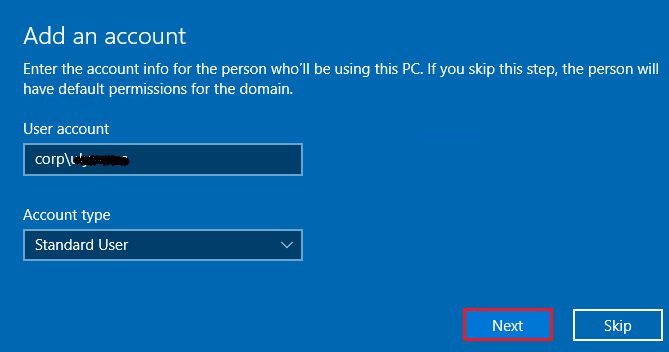
You’ll receive a request to confirm the user who will use the device. You can choose whether that user will have administrator privileges on the device or not.
Click Next.
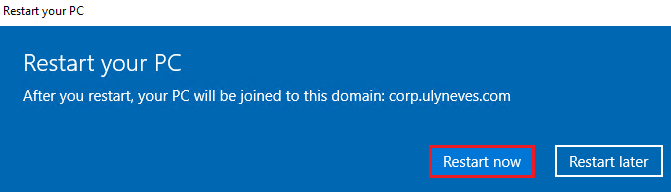
Let’s restart the device by clicking Restart now.
Wait for the next Microsoft Entra Connect replication cycle, or run the command below in PowerShell to perform a delta replication:
Start-ADSyncSyncCycle -PolicyType Delta
In the Azure portal, access Azure AD and the Devices option.
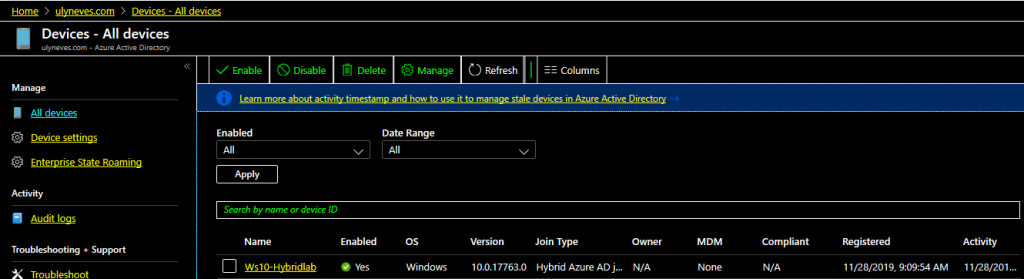
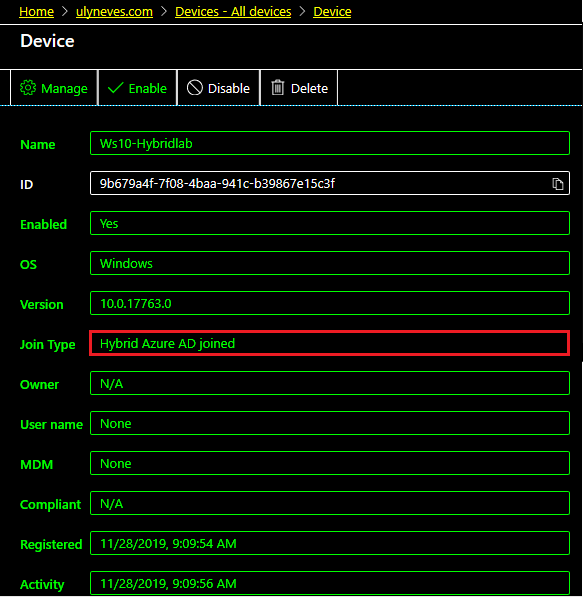
By clicking the device we just joined to the local AD, we can verify that the Join type is Hybrid AD Joined.
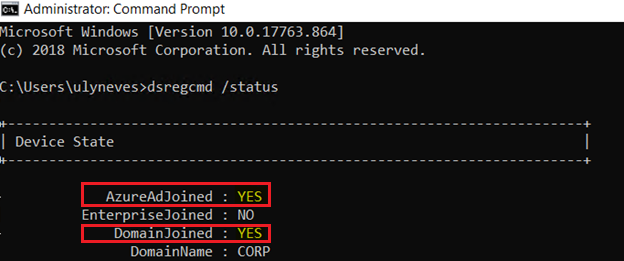
You can also identify the device’s join status in Microsoft Entra ID by running the command below in the Windows prompt on the device:
dsregcmd /status
Summary
In today’s article, we showed how to configure a federated environment for the automatic join of a Windows 10 device using Microsoft Entra Connect and AD FS. We joined a Windows 10 device to the local domain and to Microsoft Entra ID.
I hope this content has contributed to enriching your knowledge of Azure.
Did you like the post? Like and share it. 🙂
If you have any suggestions or comments, leave a comment.
[ ]’s
Ulysses Neves
