Hello everyone. In today’s article, we’ll show you how to configure an Azure credential to access Windows Server 2019 Datacenter edition or Windows 10 version 1809 or later virtual machines. This functionality is possible because the virtual machine is joined to Microsoft Entra ID during the creation process.
Benefits of using an Azure credential
Using Azure credentials for access to VMs brings several benefits to the organization:
- Use the same credentials from a federated or managed domain to allow access to the operating system.
- There’s no longer a need for local users.
- Control access to the operating system using Azure RBAC.
- Ability to use Microsoft Entra Conditional Access policies to require MFA or evaluate access risk.
Note: When you enable the option to use Microsoft Entra ID credentials to access the VM, the virtual machine is joined to Microsoft Entra ID and can no longer belong to an on-premises domain or Azure AD DS. For more information, check out this link.
We’ll walk through step by step how to create a virtual machine in Azure and grant administrator access to a Microsoft Entra ID user. This feature is currently only available for machines hosted in Azure.
Creating a server in Azure
Let’s start by creating a server in Azure. To do this, access the Virtual Machines menu in your Azure portal or click this link.
Let’s click + Add to add a new virtual machine.

On the first menu (Basics), select the subscription and the resource group available in your subscription.
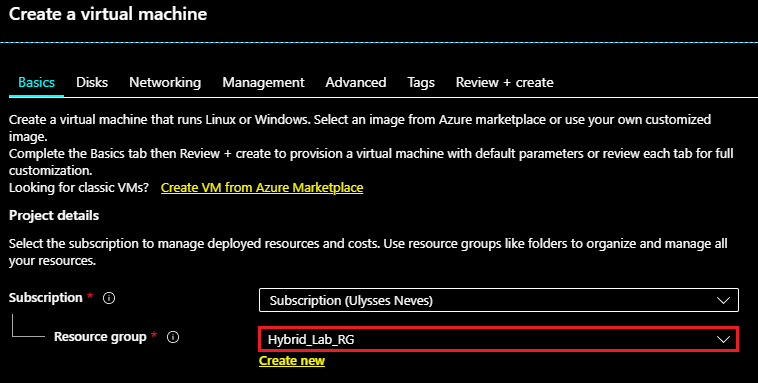
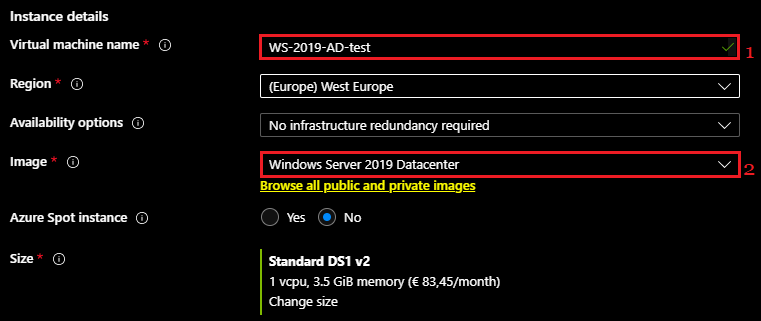
Enter the VM settings as shown below:
1 – Fill in the Virtual machine name field with your VM’s name.
2 – We’ll select the Windows Server 2019 Datacenter operating system for this illustration.
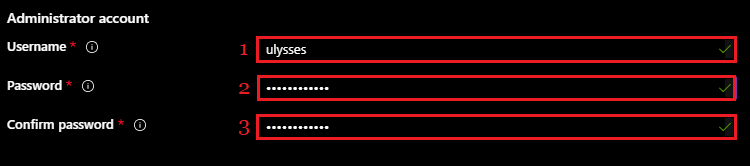
Enter the credentials that will have local access to the server:
1 – Enter the username.
2 – Enter the password.
3 – Confirm the password.
Configure the ports that will be opened for communication with your server. For this illustration, we’ll keep the default, which is remote access through port 3389.
Click Next: Disks >.
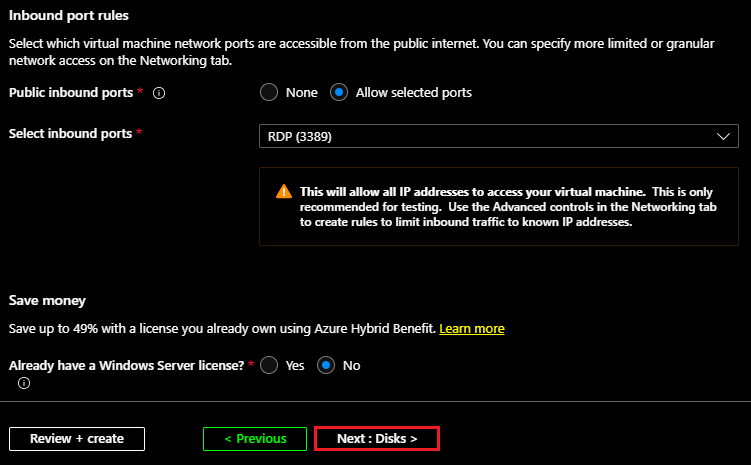
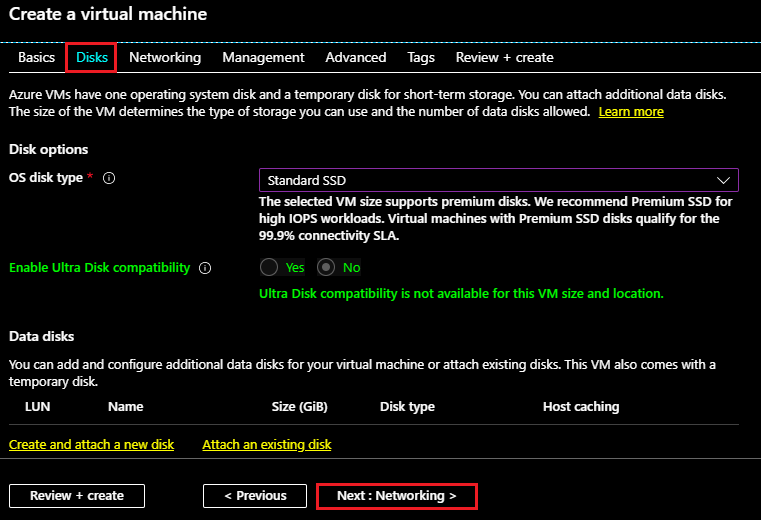
On the (Disks) tab, we’ll keep the default and click Next: Networking >.
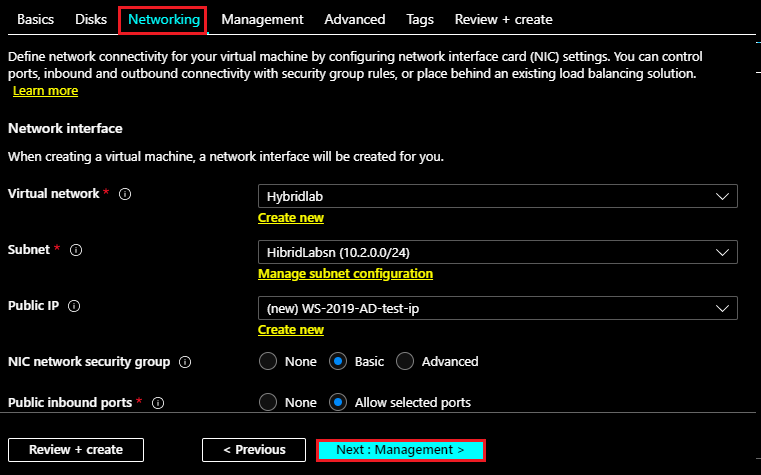
On the (Networking) tab, if you don’t have a specific network, keep the settings and click Next: Management >.
Enabling authentication with Microsoft Entra ID
The (Management) menu is the most important one for us in this article. In it, we enable the integration between the operating system and Microsoft Entra ID.
To enable the access integration, change the Login with AAD credentials (Preview) option to On.
Click Review + Create.
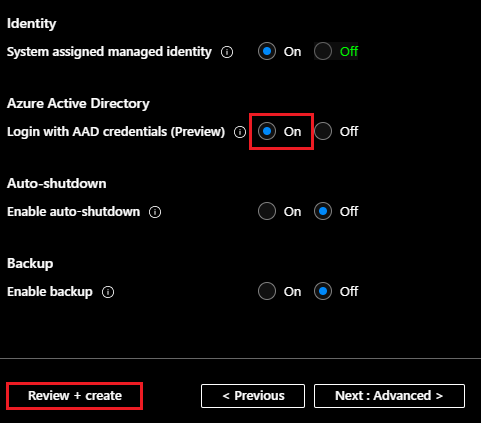
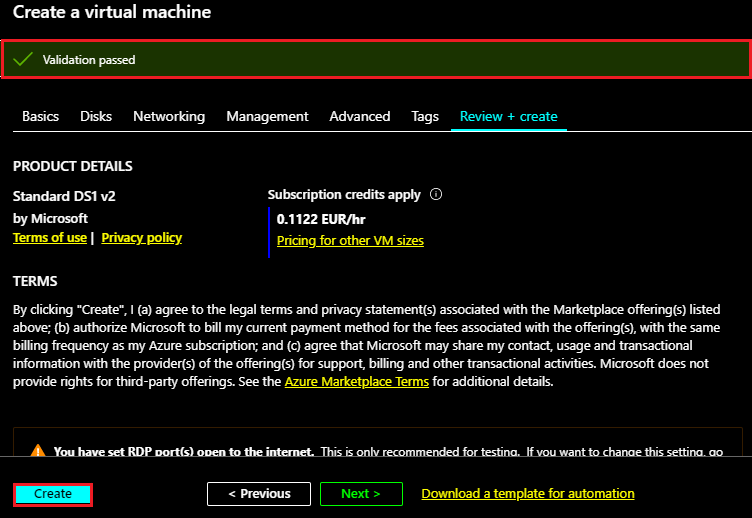
Next, Azure validates the minimum settings required to create the VM and displays the message “Validation passed”.
Click Create.
Configuring permissions in Azure
With the VM created, let’s now define who will have access privileges to it.
Click the virtual machine you created.

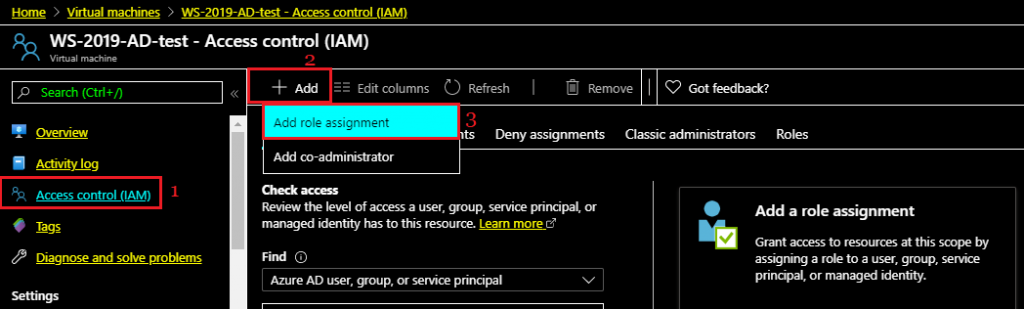
Follow the steps below:
1 – Click Access control (IAM).
2 – Click + Add.
3 – Click Add role assignment.
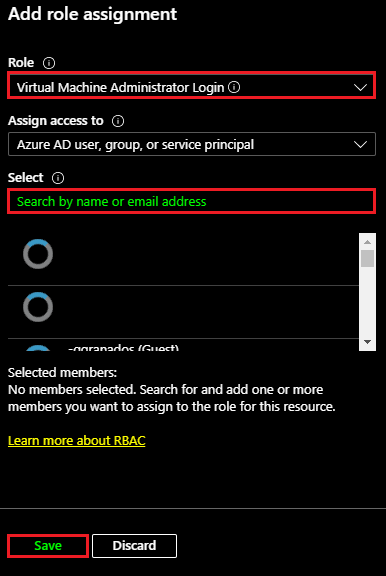
In the Add role assignment menu, select the Virtual Machine Administrator Login role so we can populate the group that grants administrator access to virtual machines in Azure.
In the select field, search for the Microsoft Entra ID user you want to grant administrative access to on the VM.
Select the user and click Save.
Accessing the VM with the Azure credential
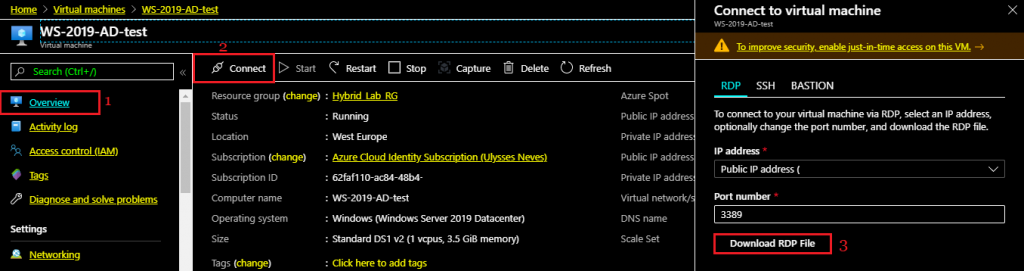
Let’s now access the virtual machine by following these steps:
1 – With the virtual machine selected, click Overview.
2 – Click Connect.
3 – Click Download RDP File.
Note: To access the VM via RDP, you need to use a Windows 10 device that is Microsoft Entra joined or Microsoft Entra hybrid joined and belongs to the same domain as the VM you created. For more information, check out this link.
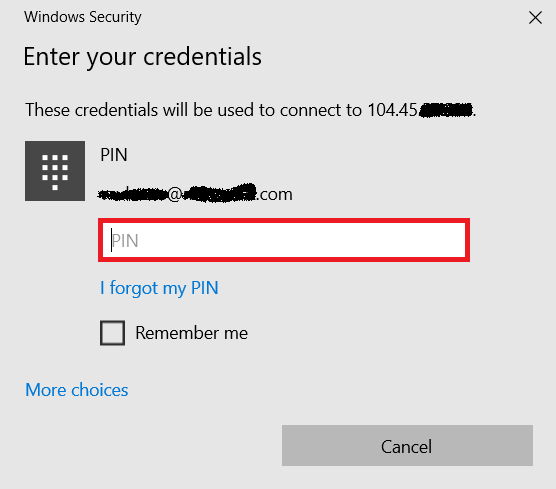
Run the .rdp file and sign in with the Azure credential that was granted access in the previous step.
Verifying permissions on the VM
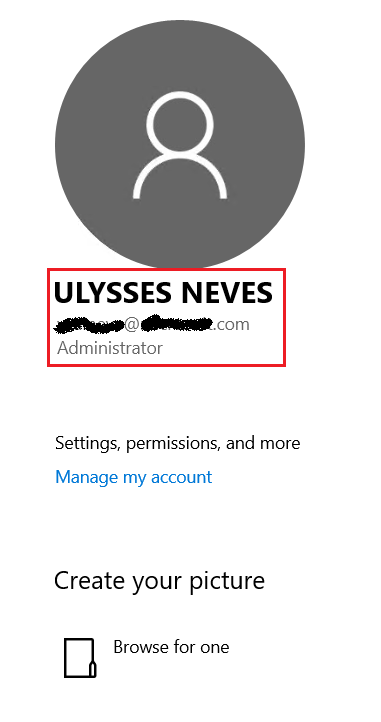
With access successfully completed, let’s now validate whether the administrator permission was granted correctly.
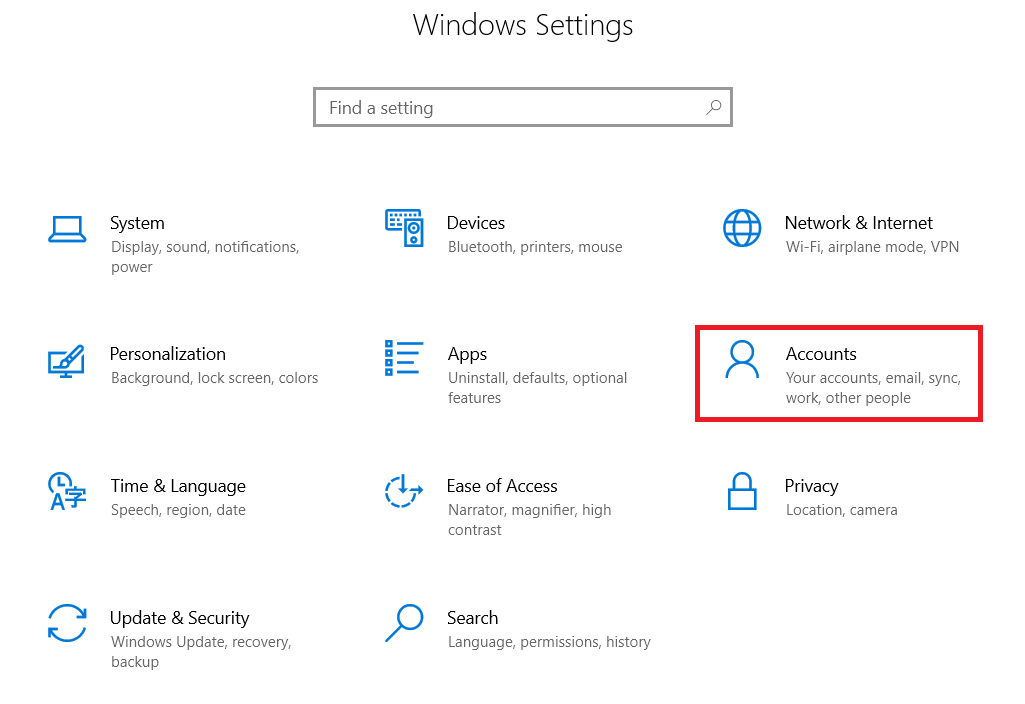
In the Windows Windows Settings menu, select the Accounts option.
We can see that the selected Microsoft Entra ID user appears with the Administrator role.
Validating server status
Let’s confirm whether the server was correctly joined to the Microsoft Entra ID domain by running the command below in the Windows prompt:
dsregcmd /status

You can see in the AzureAdJoined field that the server is joined to Microsoft Entra ID.
Summary
In today’s article, we showed how to create a VM in Azure while enabling access through a Microsoft Entra ID sign-in. We defined this user’s permission level and confirmed that the VM we created was joined to Microsoft Entra ID.
I hope this content has helped enrich your knowledge of Microsoft Entra ID.
Did you like the post? Like and share it. 🙂
If you have any suggestions or comments, let us know.
[ ]’s
Ulysses Neves
