Hello, everyone. In today’s article, we’ll explain step by step how to configure Microsoft Entra ID accounts to access a SQL database in Azure. The integration between Microsoft Entra ID and SQL database instances allows for centralization and greater access control over SQL resources hosted in Azure. It’s possible to use credentials replicated to Azure through Microsoft Entra Connect (hybrid) or created directly in Microsoft Entra ID (Microsoft Entra ID-only).
Creating a database
Let’s start by creating a database-type resource in Azure. To do this, search for the SQL databases resource in Azure search or access this link.
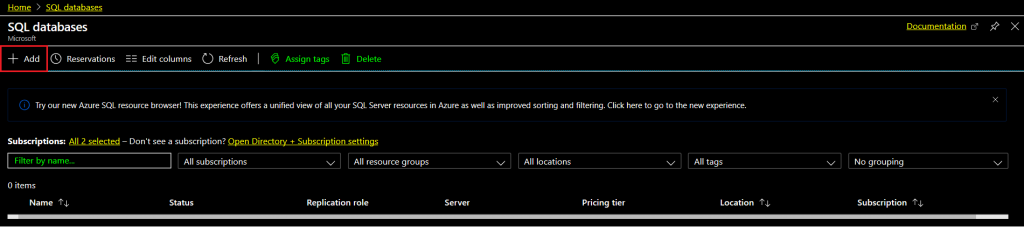
In the SQL databases menu, click + Add.
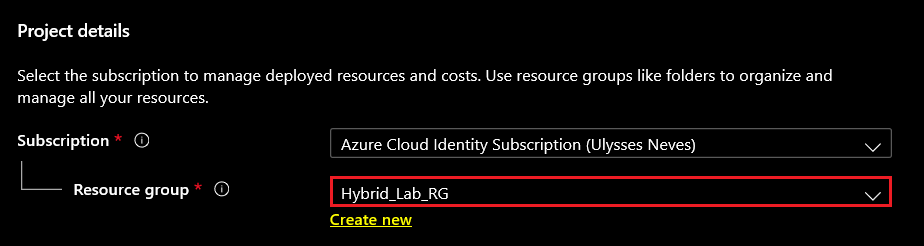
Select the Resource group you want to use to create the database.
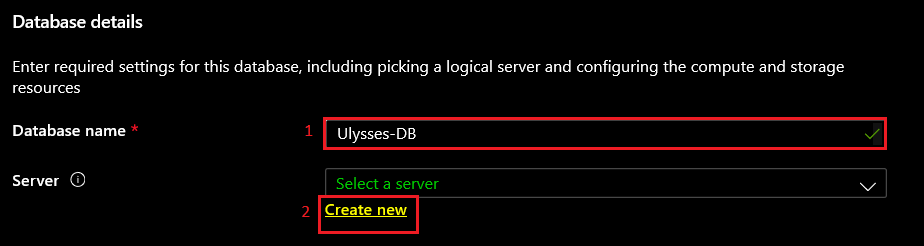
In the Database details option, follow the steps below:
1 – In the Database name field, enter the database name.
2 – In the Server field, if you don’t have a SQL server created, click Create new.
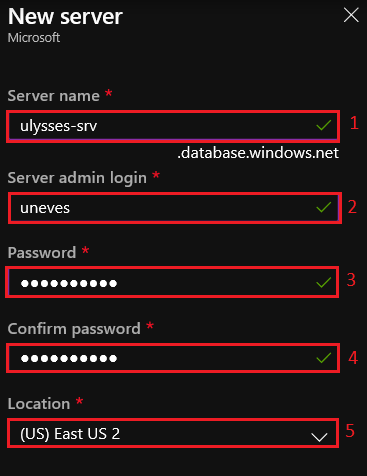
To create the new server, enter the information as below:
1 – In the Server name field, enter the server name.
2 – In the Server admin login field, enter the local administrator credential for the SQL server.
3 – Enter the local administrator user’s password.
4 – Confirm the password created.
5 – Select the SQL server location.
Click Review + create.
Click Create.
Configuring the database firewall
With the database created, let’s configure the SQL server firewall to be accessed only by my external IP.
Select the created database and click Set server firewall.
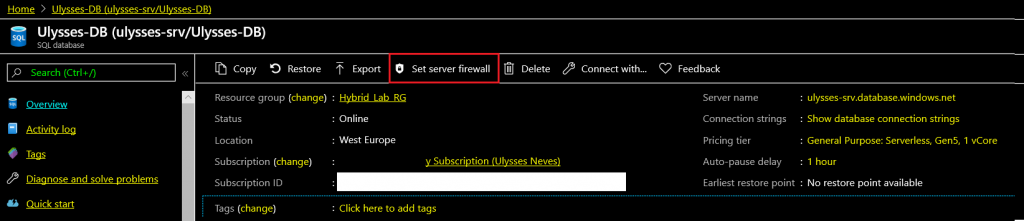
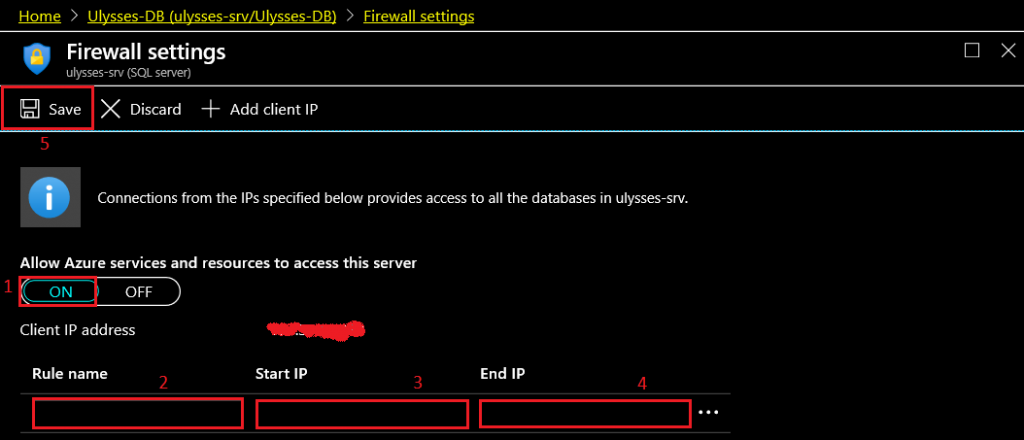
The external IP connected to the Azure portal is captured and displayed in the Client IP Address option. To configure only my external IP, follow the steps below:
1 – In the Allow Azure services and resources to access this server option, select ON.
2 – Enter the rule name.
3 – Enter the start IP. For illustration purposes, I’ll configure only one external IP for access to the SQL server.
4 – Enter the same IP as in step 3.
5 – Click Save.
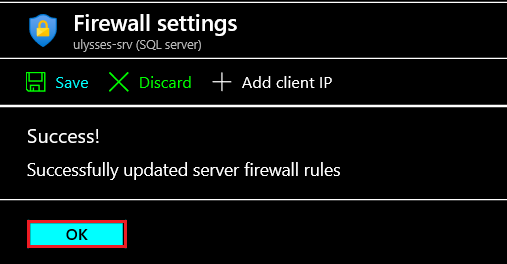
Confirm the configuration by clicking OK.
Configuring the AD user as DB admin
To configure the Azure administrator user for the SQL server, access the SQL Servers menu in Azure or click this link.
Click the server you created to host your database.
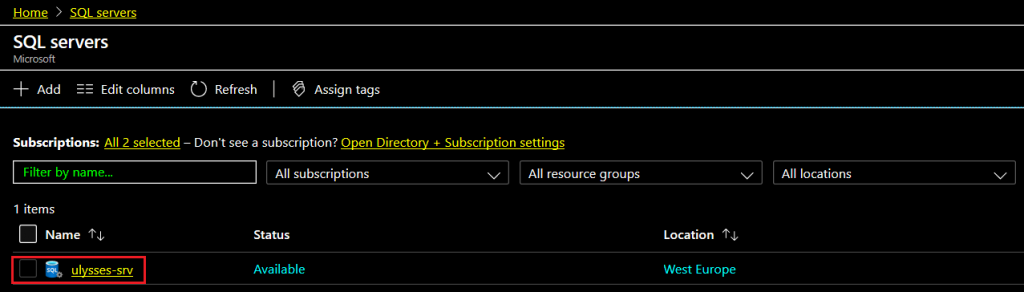
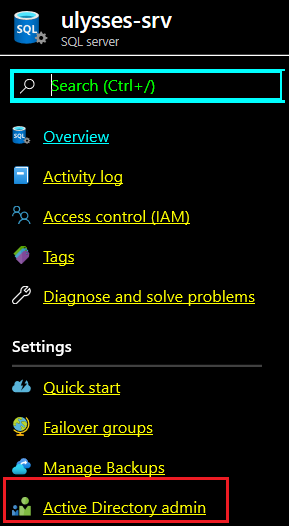
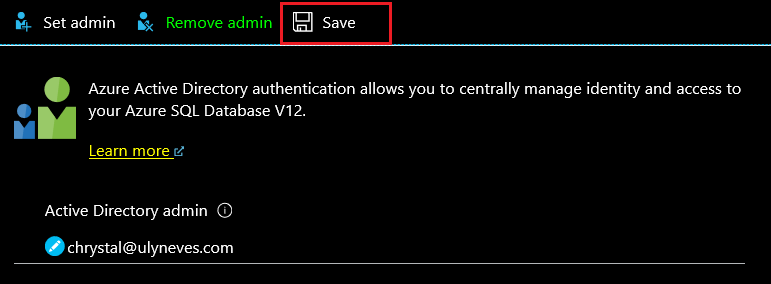
Select the Active Directory Admin menu.
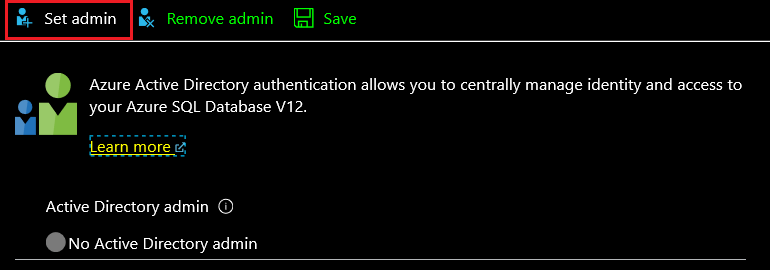
Click the Set admin option.
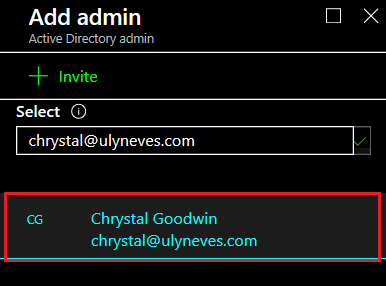
Let’s select the user chrystal@ulyneves.com for this illustration. It’s possible to use groups to centralize administrators of the selected SQL server.
Click Save.
Connecting to the SQL database
Let’s connect to the database using Visual Studio. If you haven’t installed it, access this link to download it.
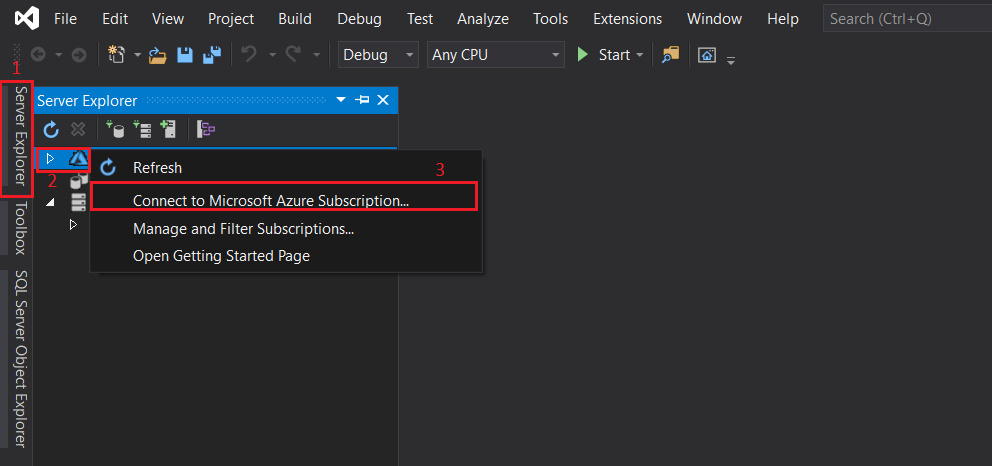
With Visual Studio installed, let’s connect to Azure with the credential we granted access to the SQL server resource with in the previous step. Follow the steps below:
1 – Select Server Explorer.
2 – Right-click the Azure icon.
3 – Select Connect to Microsoft Azure Subscription…
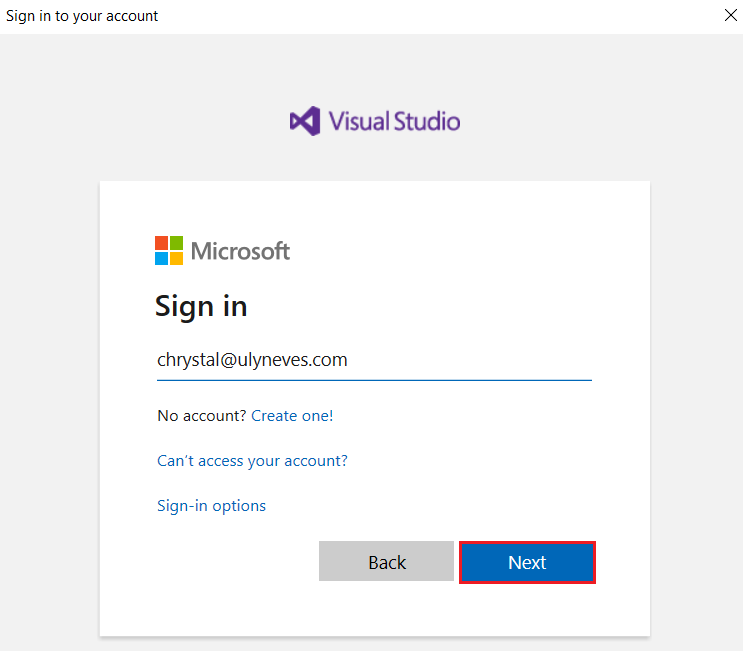
Enter the credentials of the account that received access to the SQL server resource in Azure.
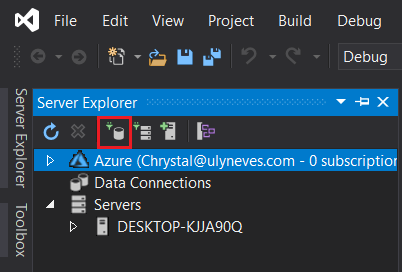
With the SQL administrator authenticated in Azure, let’s connect to the database by selecting the connect to database option, as below:
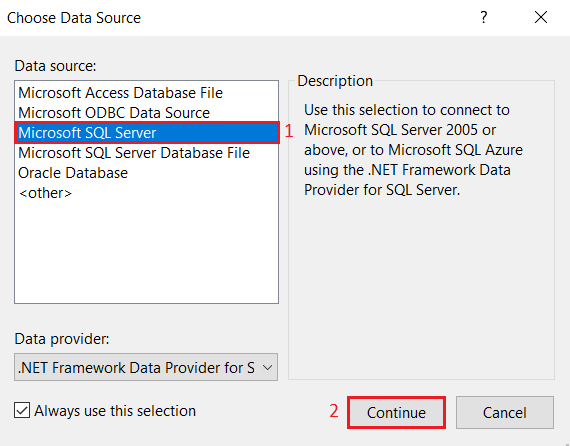
Select the options below:
1 – As Data Source, select the Microsoft SQL Server option.
2 – Click Continue.
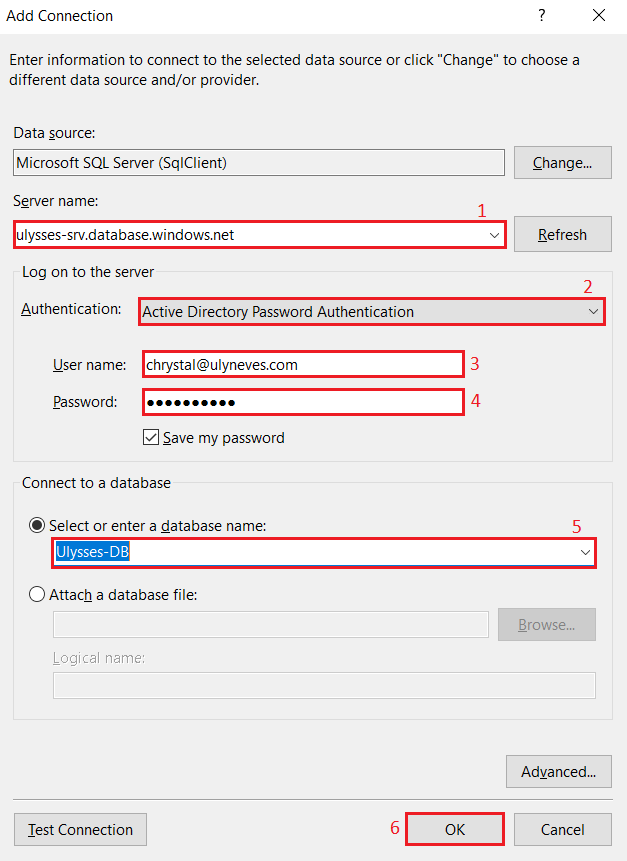
To configure the connection to the database, perform the steps below:
1 – Enter the SQL server address in Azure.
2 – Select the Active Directory Password Authentication option.
3 – Enter the Azure user credential.
4 – Enter the user’s password.
5 – Select the database.
6 – Click OK.
Creating a table in the database
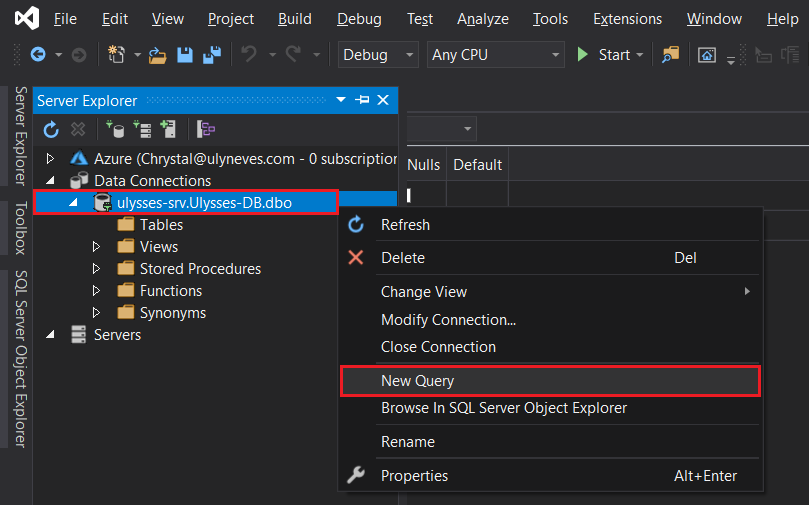
Let’s create a table in the Ulysses-DB database. Right-click the database we connected to in the previous step.
Select New Query.
Let’s create a table by entering the command below and clicking Run.
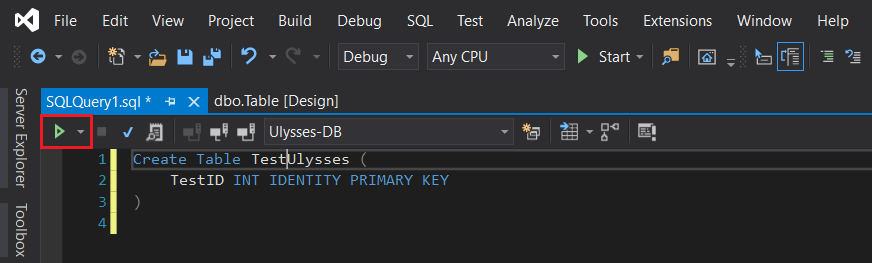
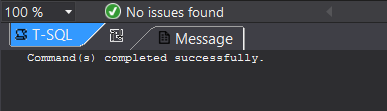
In the image below, we can see that the table was created successfully.
Validating the table created in the database
Now let’s validate the table creation through the Azure portal.
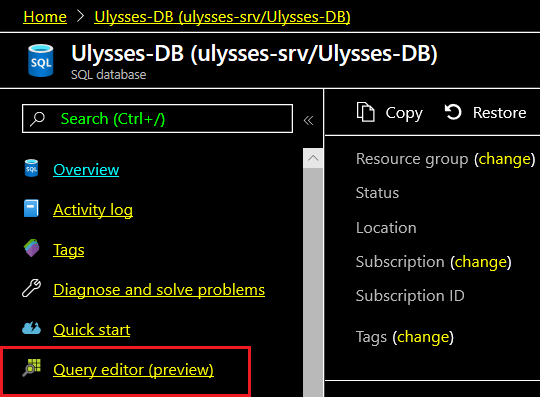
In the database menu, select the Query editor (preview) option.
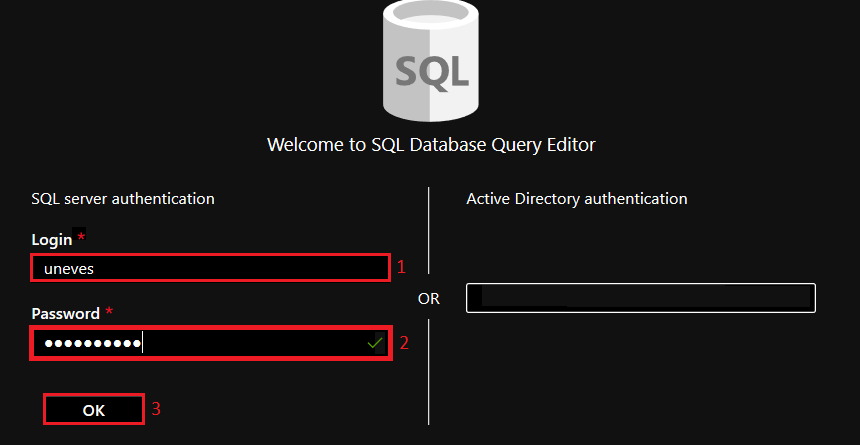
Let’s connect using the local administrator credential we created at the beginning of this article by performing the steps below:
1 – Enter the local administrator credential.
2 – Enter the password.
3 – Click OK.
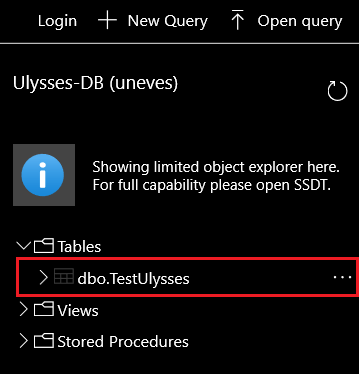
Expanding the Tables menu, we can see the TestUlysses table created.
Summary
In today’s article, we explained step by step how to configure a Microsoft Entra ID identity with administrative access to a SQL database resource in Azure.
During the illustration we performed the following steps:
- We created a SQL server in Azure
- We created a SQL database in Azure
- We configured the firewall rules on the database
- We configured admin permission for the user chrystal@ulyneves.com
- We connected to the database using the Microsoft Entra ID credential
- We created a table using Visual Studio
- We validated the table created in the database through the Azure portal.
I hope this content has helped enrich your knowledge of Azure.
Did you like the post?
Like it and share it. 🙂
If you have any suggestions or comments, let us know.
[ ]’s
