Hello everyone. Today I’ll present a step-by-step guide on how to integrate Conditional Access policies with Exchange Online policies to limit access to OWA. With the rise of mobility and the growing concern organizations have about protecting information stored on mobile devices, administrators face the difficult task of protecting the information that users can access.
In today’s article, I’ll show how to block the download and editing of files attached to emails based on the user’s location. We will perform the following tasks:
- Integrate the OWA access policy in Exchange Online with the Conditional Access policy in Microsoft Entra ID.
- Create a country-based location.
- Create a Conditional Access policy to block the download and editing of files outside the location configured in the previous step.
Integrating the OWA policy with the Conditional Access policy
To integrate the OWA access policy with the Conditional Access policy, the first step is to connect to EXO using PowerShell.
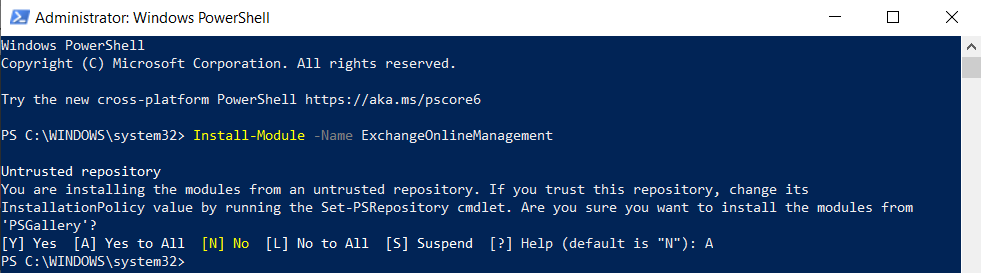
Let’s open PowerShell in administrator mode and run the command below to install the Exchange Online module:
Install-Module -Name ExchangeOnlineManagement
As shown on the screen below, confirm the installation by selecting the All option.
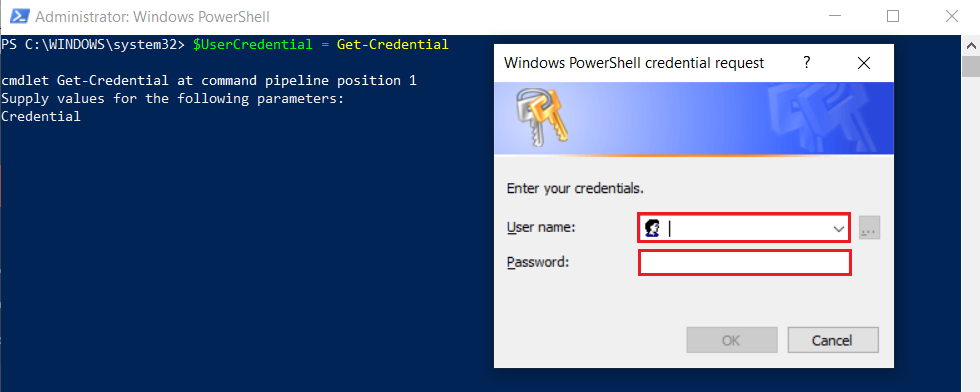
With the module installed, let’s connect to the EXO service. Run the command below to capture the credential for administrative access to the Exchange Online service:
$UserCredential = Get-Credential
Now let’s run the command below to create a session in the Exchange Online service using the credential stored in the previous step:
$Session = New-PSSession -ConfigurationName Microsoft.Exchange -ConnectionUri https://outlook.office365.com/powershell-liveid/ -Credential $UserCredential -Authentication Basic -AllowRedirection
You should see the screen below after running the command.

Now let’s run the commands below to allow scripts to run remotely:
Set-ExecutionPolicy RemoteSigned

Import-PSSession $Session -DisableNameChecking

Let’s test the connection by running the command below to retrieve the mailboxes available in the EXO service:
Get-Mailbox *

For more information about connecting to EXO using PowerShell, take a look at this document available on the Microsoft website.
Integrating the OWA access policy in Exchange Online
Connected to EXO, run the command below to integrate the Exchange Online OWA access policy with the Conditional Access policy as read-only. This will enable the “Read Only” rule in OWA for access that matches the Conditional Access policy that we will define later.
Set-OwaMailboxPolicy -Identity OwaMailboxPolicy-Default -ConditionalAccessPolicy ReadOnly

Creating a trusted location in Microsoft Entra ID
With the integration in EXO created, let’s now create a location considered trusted to define the exception in the Conditional Access policy.
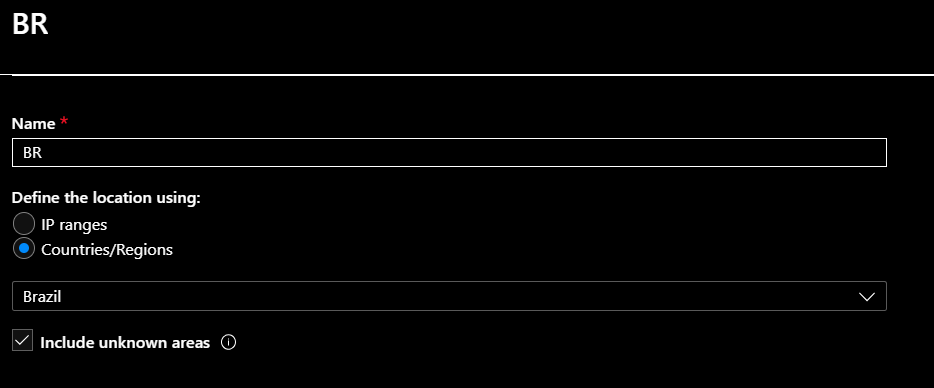
For our illustration, let’s create a country-based location. To do that, go to the Named locations menu.
Let’s click New location to create a location based on countries/regions.
Creating the Conditional Access policy
With the named location created, let’s create the Conditional Access policy by going to the Conditional Access | Policies menu.
Let’s create a new policy by clicking New policy.
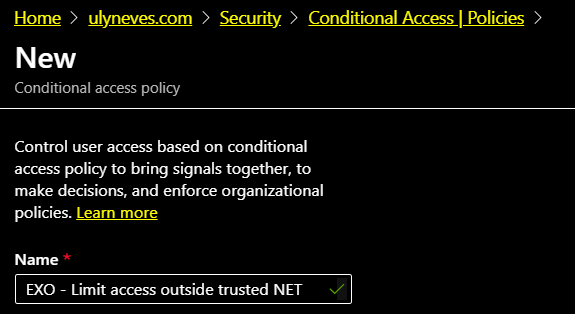
Let’s define a name for the Conditional Access policy we are creating.
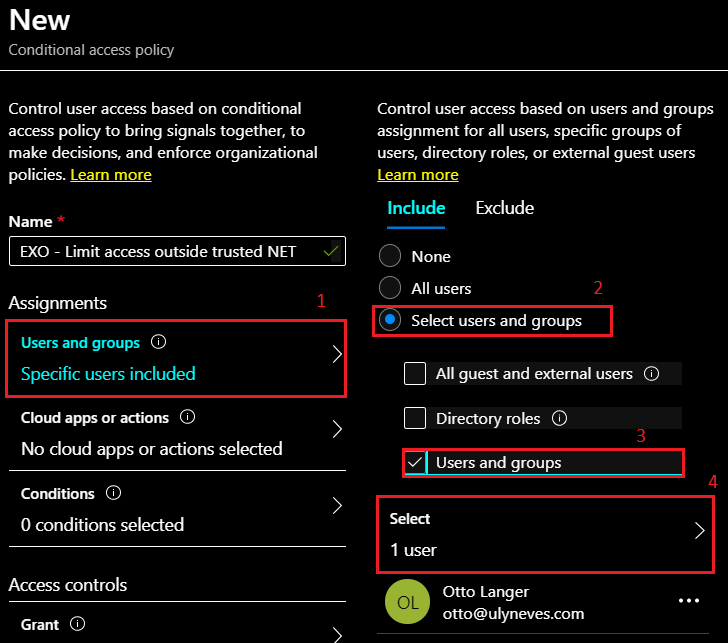
In the steps below, we’ll define which users will be affected by the policy:
1 – Select the Users and groups option.
2 – Select the Select users and groups option. I’ll select only one user for our illustration.
3 – Check the Users and groups option.
4 – Select the users to whom you want to apply the policy.
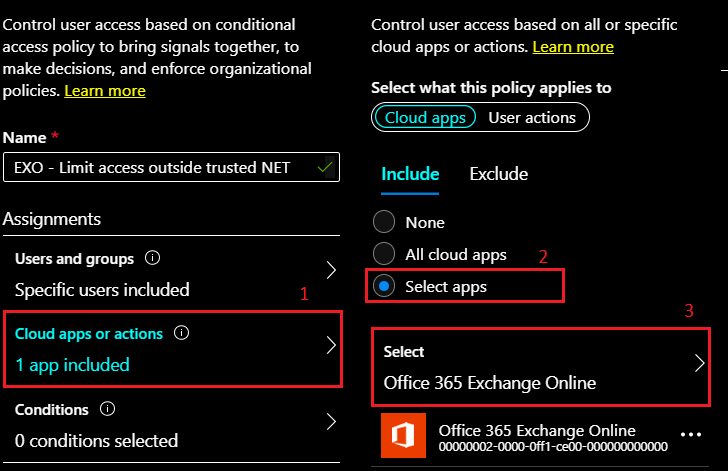
Now let’s define which application will be affected by the policy. We’ll define the Office 365 Exchange Online application as the application to be controlled by performing the steps below:
1 – Select the Cloud apps or actions menu.
2 – Select the Select apps option.
3 – Select the Office 365 Exchange Online application.
Click Done.
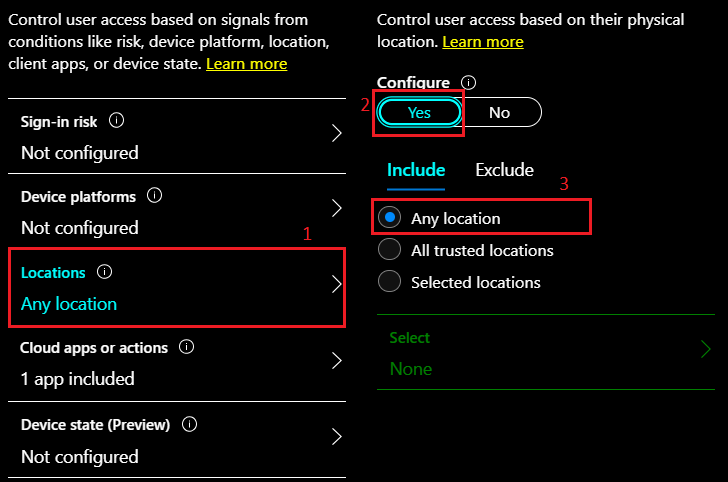
Now let’s define the location to be controlled by the policy by following the steps below:
1 – Select the Conditions > Locations menu.
2 – Enable the setting by selecting YES.
3 – Select the Any location option.
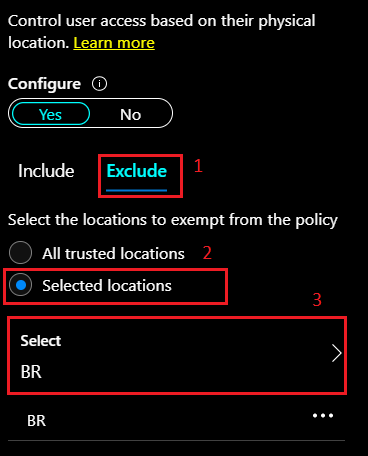
Now let’s exclude the location that we do not want to block by performing the steps below:
1 – Select the Exclude option.
2 – Select the Selected locations option.
3 – Select the locations for which you want to allow full access to OWA.
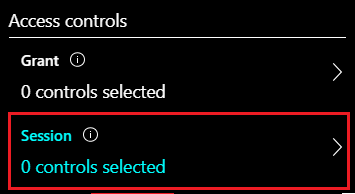
Now let’s configure the control to be applied for the criteria above. In the Access controls menu, click Session.
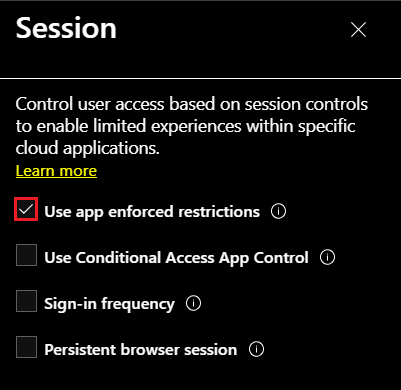
Select the Use app enforced restrictions control.
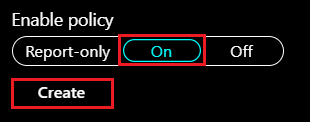
Let’s enable the policy we just configured by selecting ON in the Enable policy menu and clicking Create.
Testing the policy
To test whether the policy is working, I sent an email with an attached Excel file to the user otto@ulyneves.com configured in the policy.
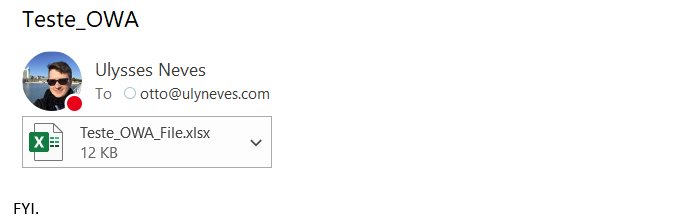
OWA access test from Brazil
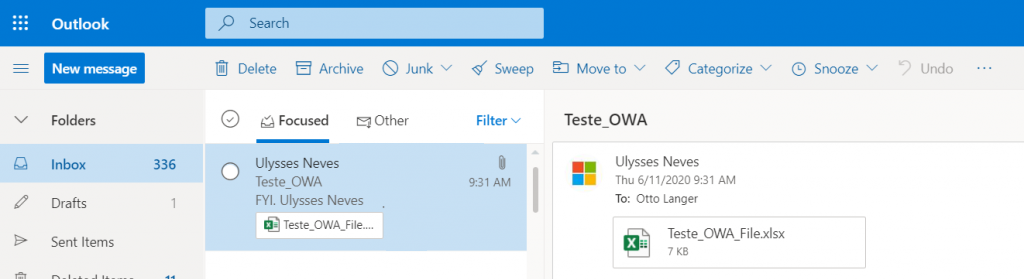
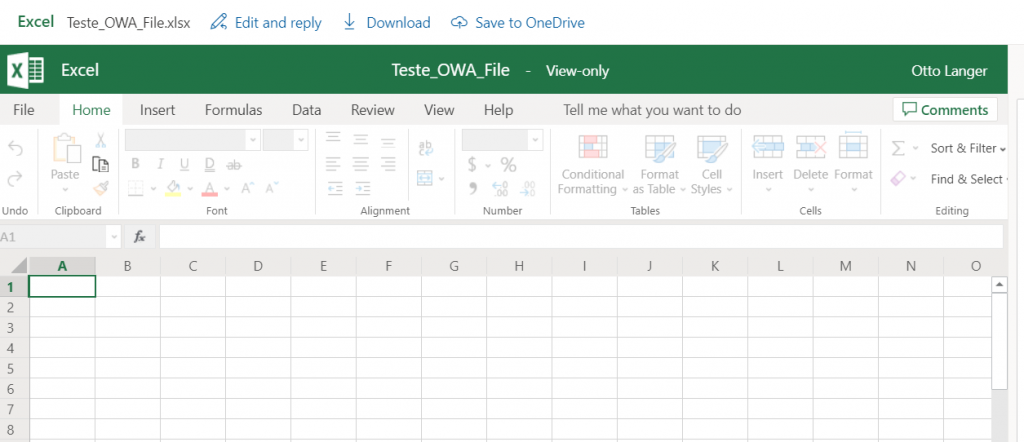
Let’s now access the email of user otto@ulyneves.com from Brazil, which the Conditional Access policy considers a trusted location for downloading or editing attached files.
We observe that access is normal and it is possible to download or edit the attached file as usual.
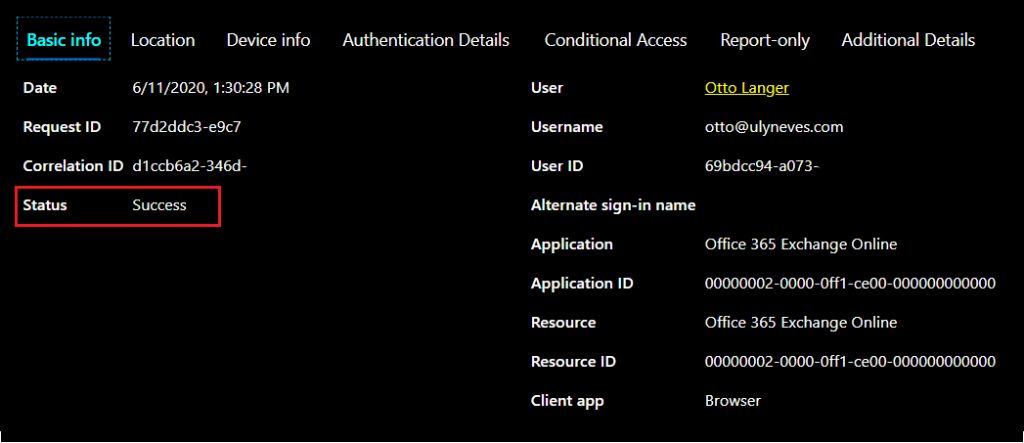
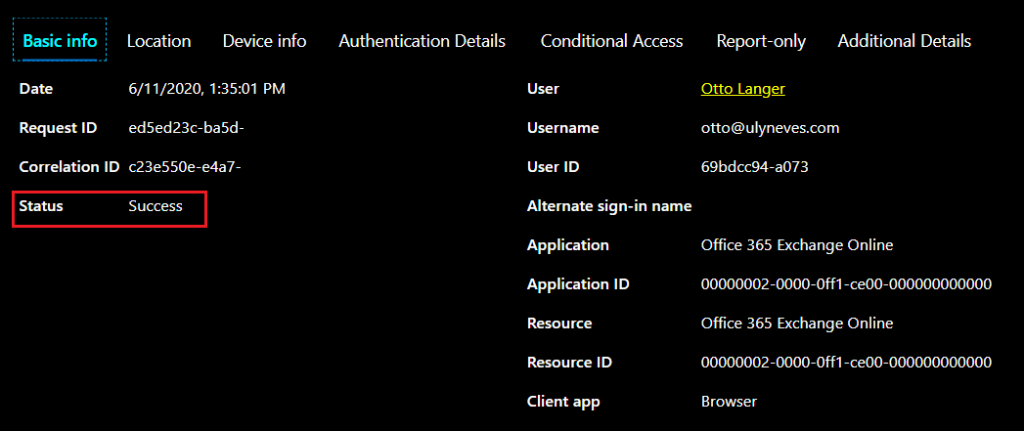
When evaluating the access in the Microsoft Entra ID logs, we observe on the Basic info tab that the user otto@ulyneves.com successfully accessed the Office 365 Exchange Online service.
On the Location tab, we can observe that the access originated from Brazil, which the policy considers an exception to the access control.
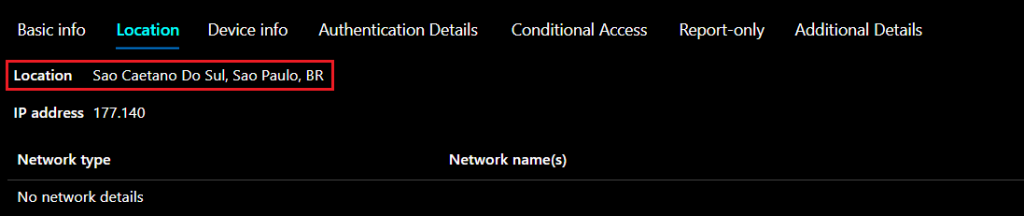
As a result, the Conditional Access policy is not applied, as indicated by the Result column.

Access from outside Brazil
Now let’s test OWA access from a location controlled by the Conditional Access policy.
Let’s access OWA from a device located in Amsterdam.
When opening the same email, we observe the message: Your organization doesn’t allow you to download or print attachments from this device or browser. You can still view attachments in your browser. For more information, contact your IT administrator.
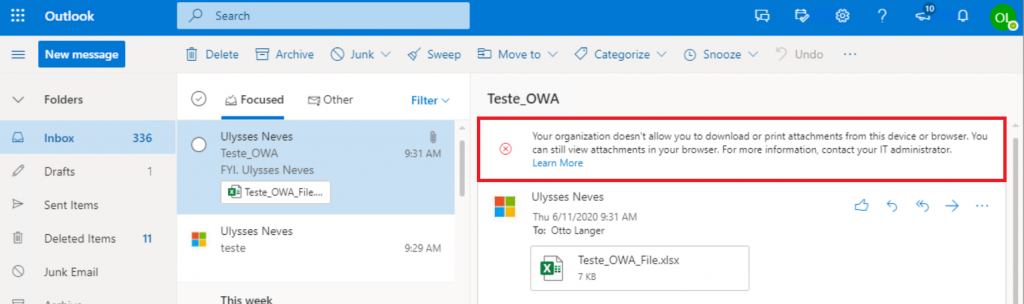
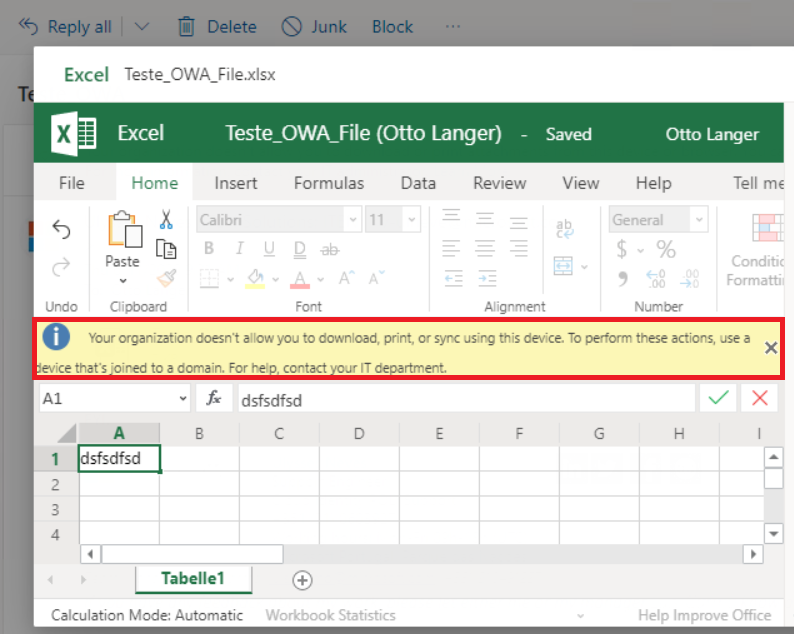
When clicking the attached document, we observe the same message.
When evaluating the access above in the Microsoft Entra ID sign-in logs, we observe on the Basic info tab that access to the Office 365 Exchange Online service is successful, just as in the previous test.
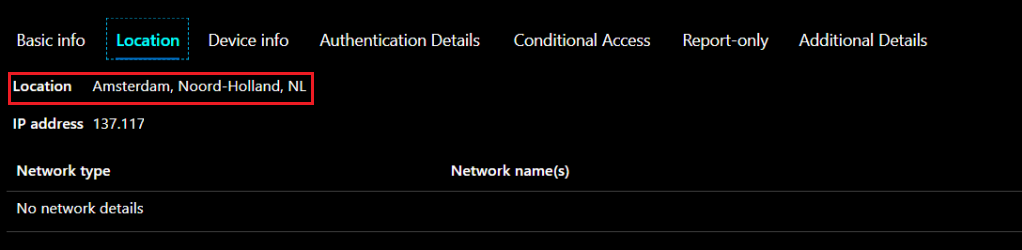
We confirm through the Location tab that the access originated from Amsterdam, which is a location affected by the policy we configured.
On the Conditional Access tab, we can observe that the Conditional Access policy has a Success result, meaning that all criteria were satisfied to apply the read-only access policy to the data through OWA.

Summary
In today’s article, we demonstrated how to limit user access through OWA by using Conditional Access policies integrated with OWA policies in Exchange Online.
I hope this content has helped broaden your knowledge of Microsoft Entra ID.
Did you like the post? Like and share. 🙂
If you have any suggestions or observations, leave a comment.
Regards,
Ulysses Neves
