
Hello everyone. When configuring a conditional access policy based on platform (operating system), it can happen that the administrator doesn’t account for operating systems that aren’t listed in the policy — for example, unsupported platforms, or cases where client applications don’t send device information during authentication. The result is that this access isn’t controlled by the Azure policy.
Today I’ll show a simple tip for controlling access from devices that aren’t listed in the “Device platforms” option in the conditional access policy. For this demonstration, we’ll use the Office 365 CLI application, which uses an authentication flow that doesn’t send device information during authentication in Azure AD.
In the policy we’re going to configure, we’ll just enforce MFA for access to any application if the device isn’t identified during authentication. You can also apply other access controls, such as blocking.
Activities to be performed in this article:
- Configure the conditional access policy.
- Simulate access from an unknown device using the Office 365 CLI.
- Validate the applied control in the Azure AD sign-in logs.
Configuring the Conditional Access Policy
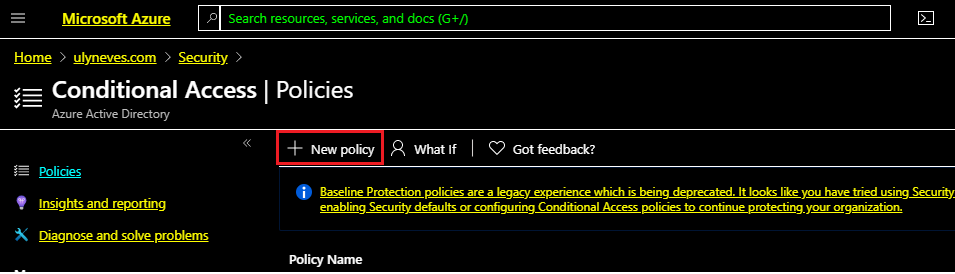
Let’s start by creating the conditional access policy, accessing the Conditional Access | Policies menu.
Click New policy.
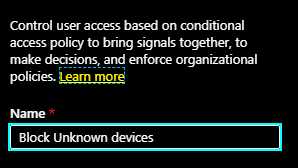
Let’s give our policy a name by filling in the Name field.
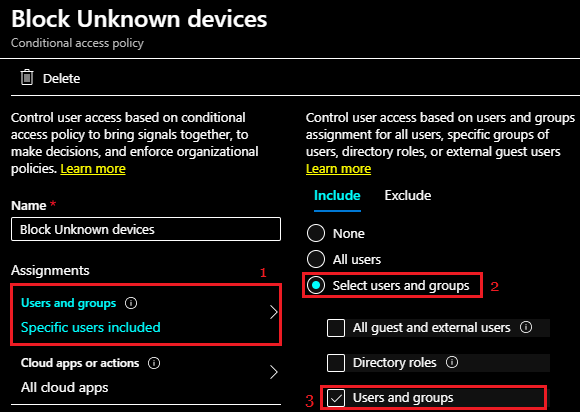
Let’s perform the steps below to define the users who will receive the policy:
1 – Select the Users and groups menu.
2 – For this simulation, we’ll select Select users and groups.
3 – We’ll check the Users and groups option and select only the user otto@ulyneves.com.
Click Select and select the user or group you want to control.
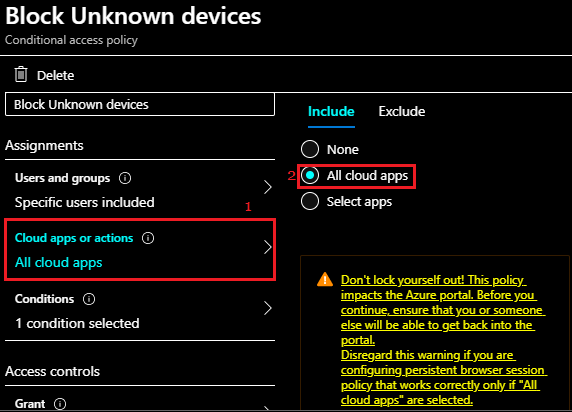
Let’s now follow the steps below to define which applications will be protected by this policy. We’ll apply it to all applications.
1 – Select the Cloud apps or actions menu.
2 – Select All cloud apps.
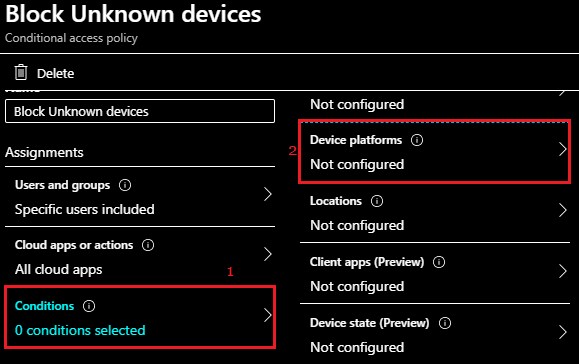
Let’s now define that users accessing from unknown devices should be prompted to perform MFA. To do this, follow the steps below:
1 – Select the Conditions menu.
2 – Select the Device platforms menu.
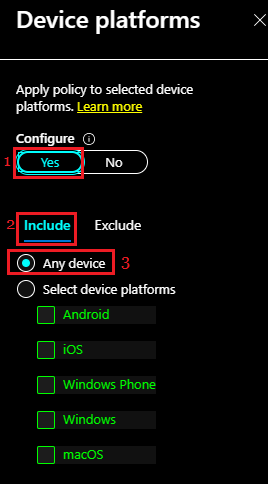
In the Device platforms menu, perform the following steps:
1 – Enable the setting by selecting YES.
2 – Confirm that the Include option is selected.
3 – Check the Any device option.
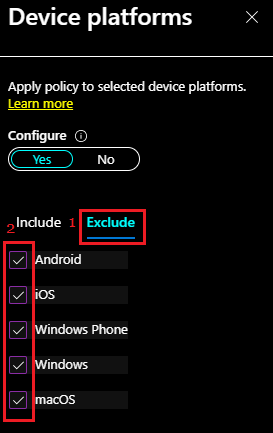
For our demonstration, we’ll check all platforms supported by the conditional access policy in the Exclude tab. If you also want to enforce the policy on one of the supported operating systems, simply uncheck the desired platform from the list below:
1 – Make sure the Exclude option is selected.
2 – Check the supported operating systems that you don’t intend to control with this policy. In our case, we want to control only unknown devices.
Click Done.
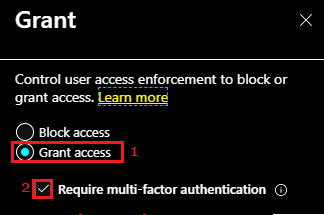
Select the Grant option in the Access controls menu. We’ll check:
1 – Grant access.
2 – Require multi-factor authentication.
Click Select.
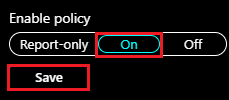
Let’s enable the policy by selecting Enable policy > On in the menu and clicking Save.
Testing the Connection Through the Office 365 CLI
As explained in the introduction of this article, we’ll validate the effectiveness of the created policy using the Office 365 CLI application, which doesn’t pass device information during authentication. For more information on how to install and use the Office 365 CLI, visit this link.
With the Office 365 CLI installed, let’s connect to Office 365 by running the command below:
office365

Let’s request the device access code using the command below:
login

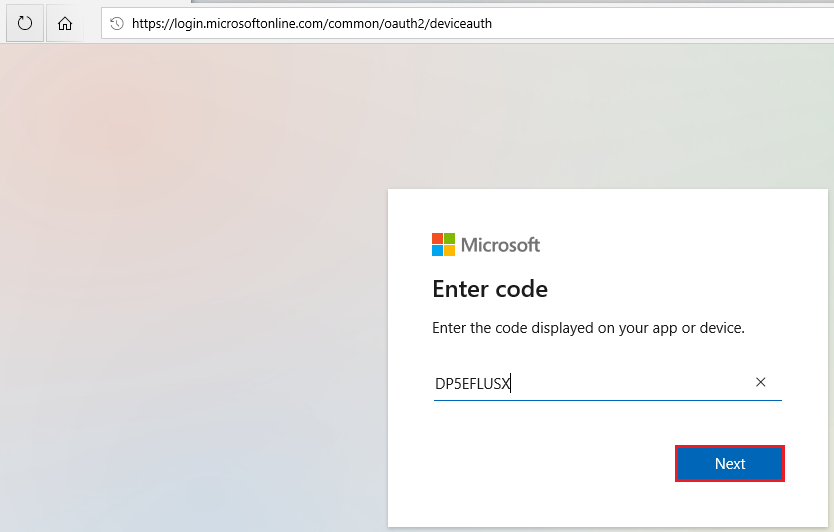
Let’s follow the device authentication flow instructions to sign in to Office 365.
Let’s paste the code and click Next.
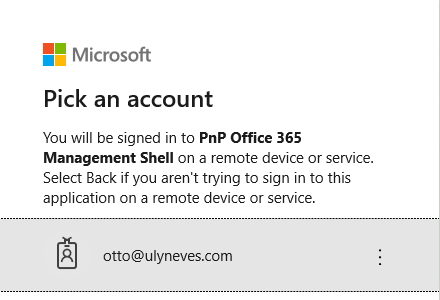
I’ll select the user I’m using for the simulation.
As expected, the user receives the notification in the Microsoft Authenticator app to perform MFA.
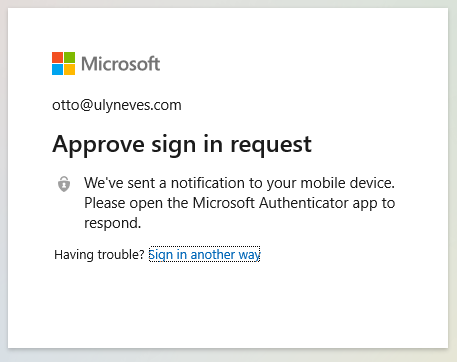
With MFA confirmed in the app, access is granted and the user is authorized to proceed.
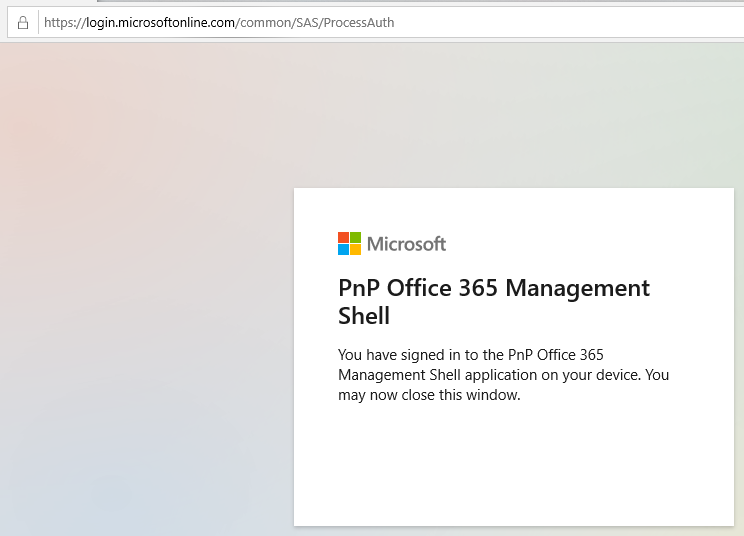
Let’s now confirm the access status in the Office 365 CLI application by typing the command below in PowerShell:
status
We can see that user otto@ulyneves.com successfully authenticated to Office 365.

Getting Information About the Access
Let’s now confirm in the Azure AD sign-in logs whether it was the conditional access policy that requested the MFA.
Let’s access the sign-ins menu using the link Azure AD | Sign-ins.
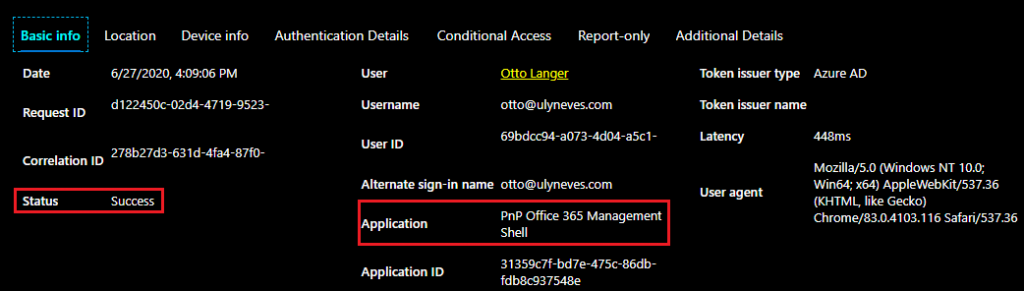
We identified the access recorded in our test below. In it, we can see that access was successfully performed to the PnP Office 365 Management Shell resource.
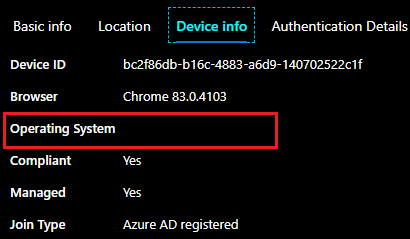
On the Device Info tab, we can confirm that the operating system wasn’t provided by the Office 365 CLI application, which allows us to apply the policy since it’s considered an unknown platform.
On the Conditional Access tab, we can identify that the control from the created policy was successfully applied.

On the Authentication Details tab, we can see in the Result detail column that MFA was completed in Azure AD, and for that reason, access was granted to the resource.

Summary
In today’s article, we demonstrated how to control access from devices considered “unknown” or unsupported by the conditional access policy in Azure.
I hope this content has contributed to expanding your knowledge of Azure AD.
Did you like the post? Like and share it. 🙂
If you have any suggestions or comments, let us know.
[ ]’s
Ulysses Neves
