Hi mates. Today we’re going to explain things to check when you receive the error message: The certificate specified does not meet all the requirements of an SSL certificate during a SSL certificate configuration on AD FS.
Scenario: You try to configure the SSL certificate on AD FS or WAP server using commands below:
WAP: Set-WebApplicationProxySslCertificate -Thumbprint ‘<thumbprint of new cert>’
AD FS: Set-AdfsSslCertificate -Thumbprint ‘<thumbprint of new cert>’
Error message:
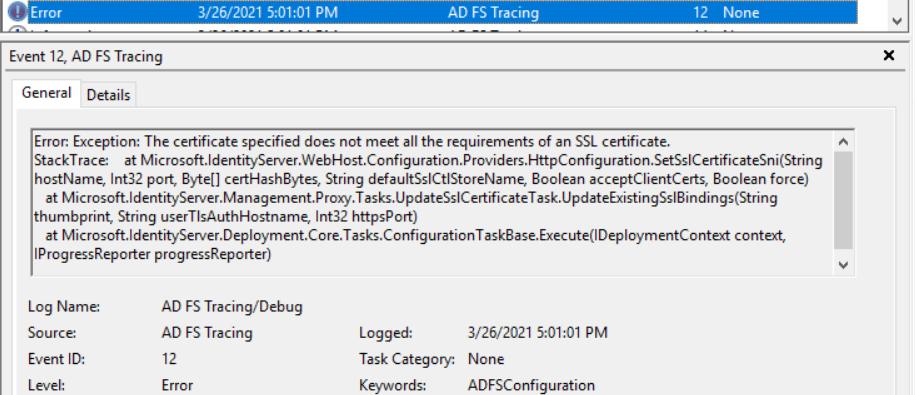
With AD FS Tracing debug enabled, you identify error message below:
With AD FS Tracing Debug enabled in the WAP, you might be able to find event ID 12 and error messages below:
SetSslCertificate failed for fs.contoso.com:443, CtlStoreName:AdfsTrustedDevices, acceptClientCerts: False
Error: Exception: The certificate specified does not meet all the requirements of an SSL certificate.
StackTrace: at Microsoft.IdentityServer.WebHost.Configuration.Providers.HttpConfiguration.SetSslCertificateSni(String hostName, Int32 port, Byte[] certHashBytes, String defaultSslCtlStoreName, Boolean acceptClientCerts, Boolean force)
at Microsoft.IdentityServer.Management.Proxy.Tasks.UpdateSslCertificateTask.UpdateExistingSslBindings(String thumbprint, String userTlsAuthHostname, Int32 httpsPort)
at Microsoft.IdentityServer.Deployment.Core.Tasks.ConfigurationTaskBase.Execute(IDeploymentContext context, IProgressReporter progressReporter)
Result: Status – Error, Message – An error occurred validating the SSL certificate. The certificate specified does not meet all the requirements of an SSL certificate., Context – PrerequisiteTest
Reason:
The private key on SSL is used to digitally sign the Certificate Signing Request (CSR), and later to secure and verify connections to your server. In case the private key is not imported with the SSL certificate, it cannot be used by AD FS or WAP services. More information on the requirements for SSL certificates, check this Microsoft document.
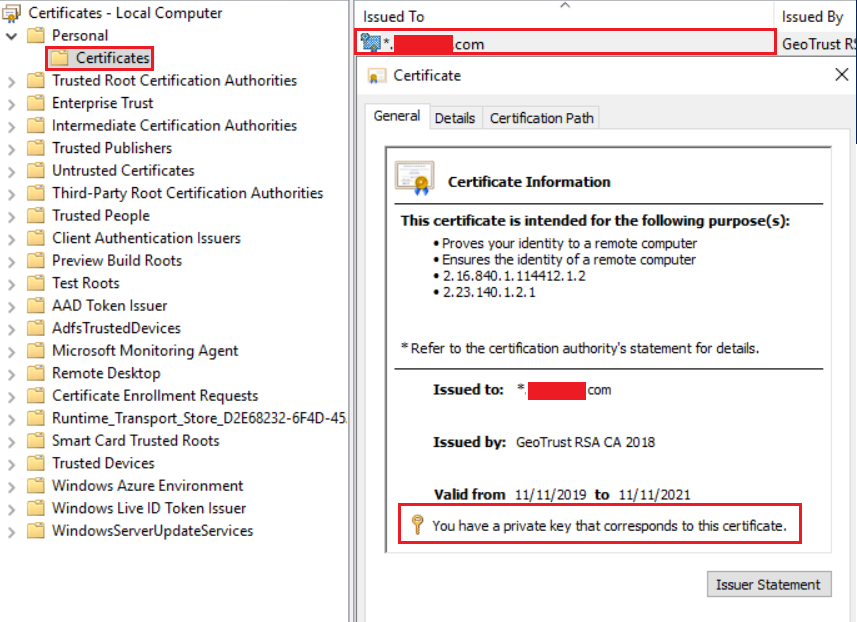
Checking if the imported certificate has the private key
First requirement to check is if the SSL certificate imported to the server has the private key.
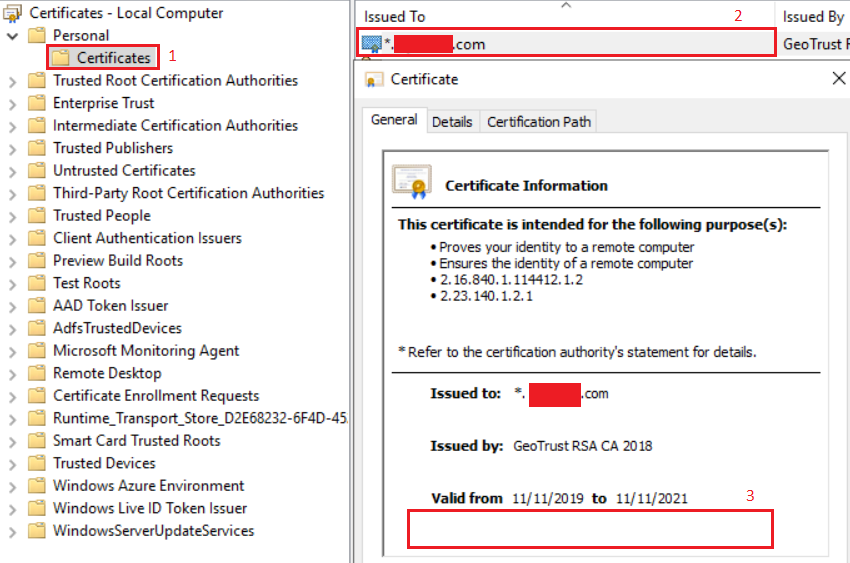
Open the certificate store running certlm.msc on PowerShell and follow steps below:
1 – Expand Personal Certificates
2 – Select the SSL certificate.
3 – Check if you see the message You have a private key that corresponds to this certificate. in the General tab.
In the screen below, we see no private key and we should import the SSL certificate again with the private key.
Exporting the SSL certificate in the AD FS server
If this is the first AD FS server you are configuring with the new SSL certificate, please request the new certificate WITH the private key from the trust CA.
If you are configuring the WAP server and exported the SSL certificate from the AD FS without the private key, follow steps below to export it correctly:
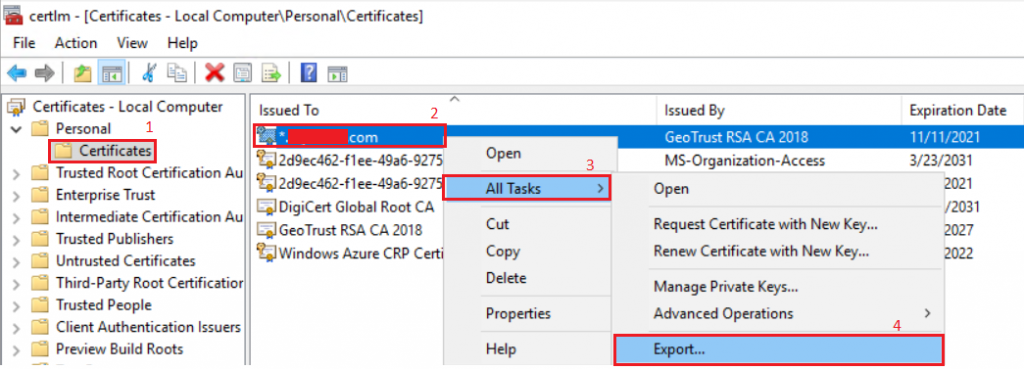
Open the certificate store running certlm.msc on PowerShell and follow steps below:
1 – Expand Personal Certificates
2 – Right click on the SSL certificate.
3 – Select All Tasks.
4 – Select Export…
On the screen below, click Next.
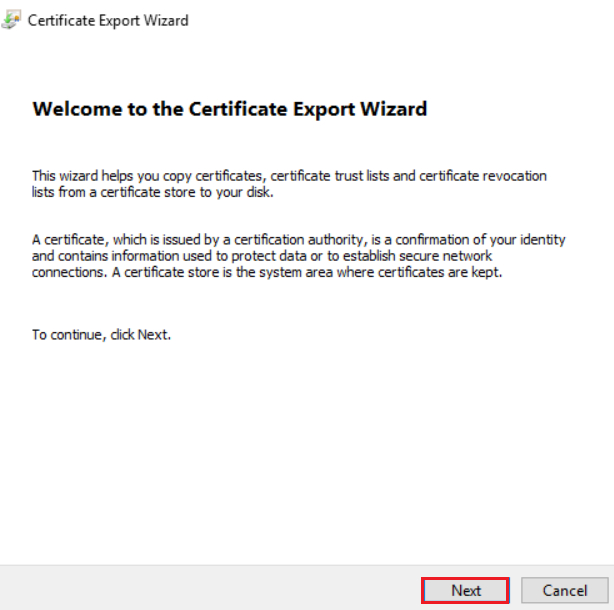
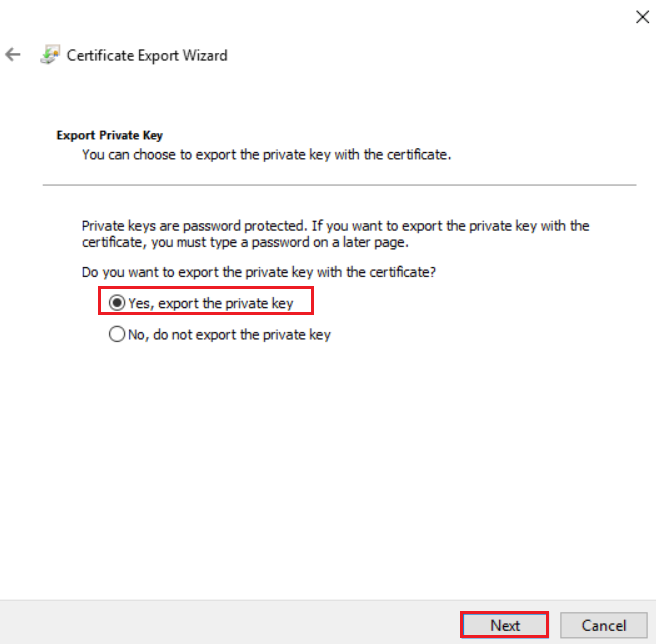
Select Yes, export the private key.
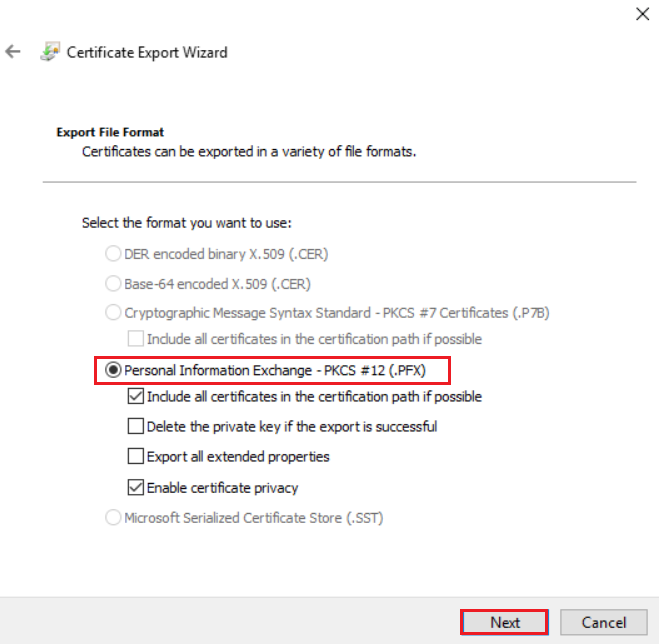
Select the format matching to (.PFX) and click Next.
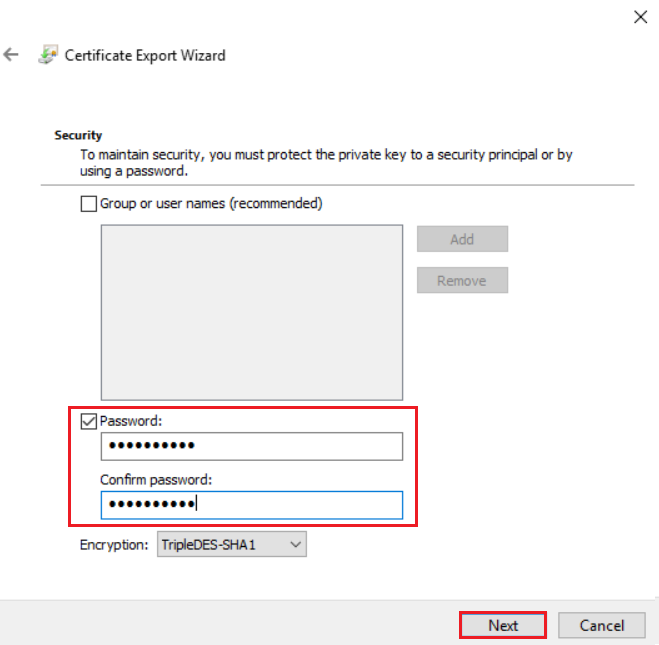
Type the password to protect the certificate and click Next.
Select a file name to the certificate to be exported and click Next.
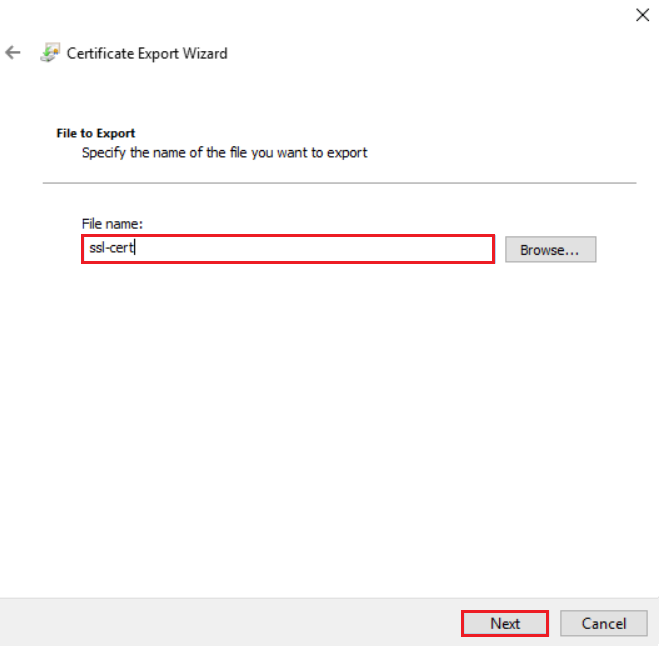
Review the configurations and click Finish.
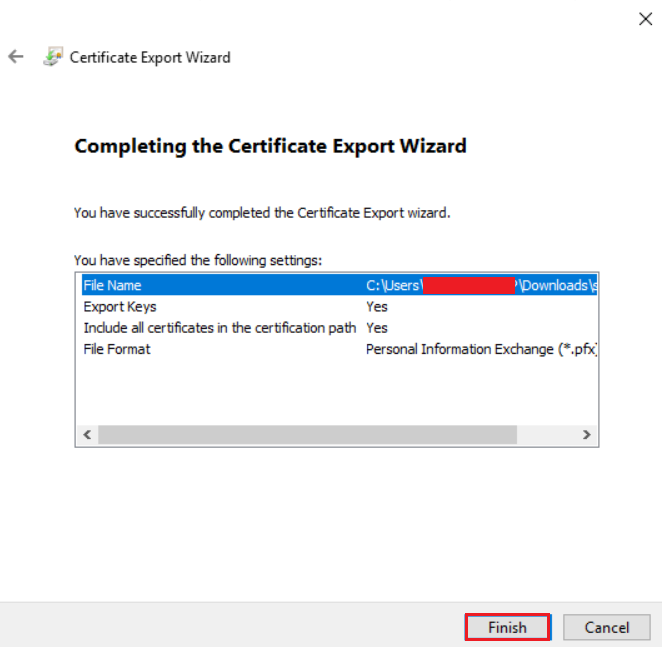
With the export successful, click on OK.
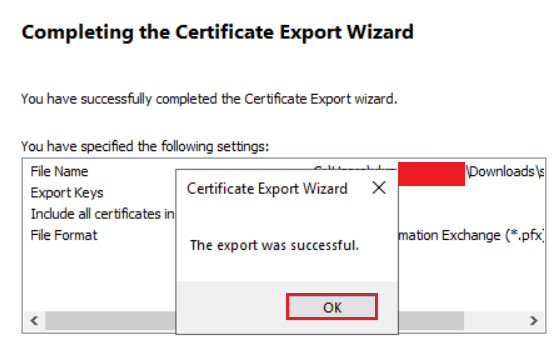
Copy the exported certificate to the WAP server and follow next steps.
Importing the SSL certificate WITH the private key
Before installing and configuring the AD FS role or configuring a new WAP server in the farm, we need to import the SSL certificate WITH the private key. Once you have the certificate, follow steps below:
Run command below to save the password used to protect the certificate into a variable:
$mypwd = Get-Credential -UserName 'Enter password below' -Message 'Enter password below'
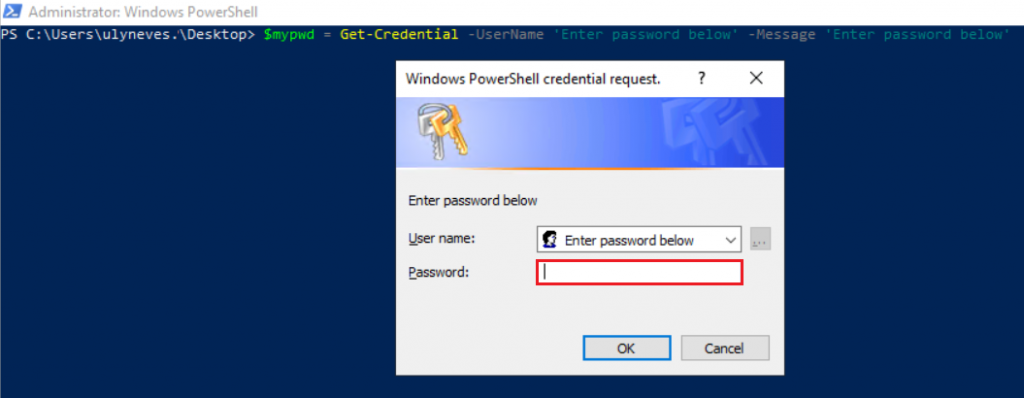
Enter the certificate’s password.
Execute the command below to import the certificate in the new server:
Import-PfxCertificate -FilePath C:\temp\cert.pfx -CertStoreLocation Cert:\LocalMachine\My -Password $mypwd.Password

Validating certificate in the store cert:\LocalMachine\My
Make sure SSL certificate was successfully imported into the server running the command below:
Get-ChildItem -Path cert:\LocalMachine\My | FL FriendlyName, Thumbprint, Subject, NotBefore, NotAfter

Check if the certificate imported has teh private key on it.
Configuring the SSL certificate on WAP server
Now that we have the SSL certificate with the private key imported, let’s configure the certificate authentication binding on the WAP using command below:
Set-WebApplicationProxySslCertificate -Thumbprint 'CERT THUMBPRINT'

You should see in the debug logs event ID 14 for successful SSL certificate installation as below:
Completed running configuration tasks for Microsoft.IdentityServer.Management.Proxy.Commands.SetSslCertificateCommand successfully.
Result: Status – Success, Message – The configuration completed successfully., Context – DeploymentSucceeded
Summary
In this article, we covered how to check the SSL certificate when you receive the error message The certificate specified does not meet all the requirements of an SSL certificate when configuring the SSL certificate on AD FS.
I hope you have enjoyed reading this article, and it helps you to manage your AD FS environment.
Enjoyed the article? Like and share. 🙂
Note: I do not represent the organization I work for, all the opinions expressed here, are my own. This post is provided AS IS with no warranties or guarantees and confers no rights.
In case you have any suggestion or feedback, please leave a comment.
[ ]’s
Ulysses Neves
