Hi everyone,
In today’s post, we’ll talk about Azure Resource Groups. It’s important to know how to work with this resource, since it’s a requirement for provisioning services in Azure.
What is a Resource Group?
The purpose of a Resource Group is to group Azure resources for a specific objective. This grouping allows the administrator to create, monitor, and control access and cost for each resource group. One option when using this resource is to define which region the group will be allocated to; however, the resources in this group can be distributed across different locations.
Tip for using Resource Groups
Considering that an Azure Resource Group is a grouping of resources, it’s a best practice to group resources that serve the same purpose and share the same lifecycle or that need to be updated simultaneously. The recommendation is to keep resources that serve the same application in the same group, since it makes management, access control, maintenance, and decommissioning easier. A good example is keeping an application, its database, or a web application in the same resource group if they follow the same lifecycle.
Another important tip is to separate resources based on business area or environment, such as separating resources for development, testing, and production.
What are tags in Resource Groups?
You use tags on Resource Groups to apply any type of categorization to your resources. You can use tags to separate departments, business areas, environment type, or cost center. This feature helps locate resources and makes it possible to record notes about the resources grouped there.
Creating a Resource Group – Step by step
If you already have an account created in Azure, go to: https://www.portal.azure.com and sign in.
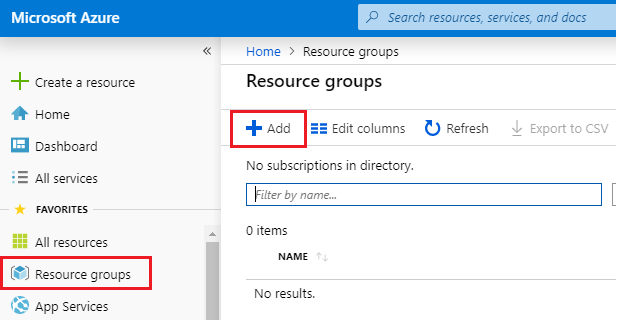
In the Azure favorite resources menu, click Resource Groups and the Add button to add a new group.
If you don’t have access, you can create a free account by visiting this link.
After accessing the Azure portal, click the Resource Groups item in the favorites menu.
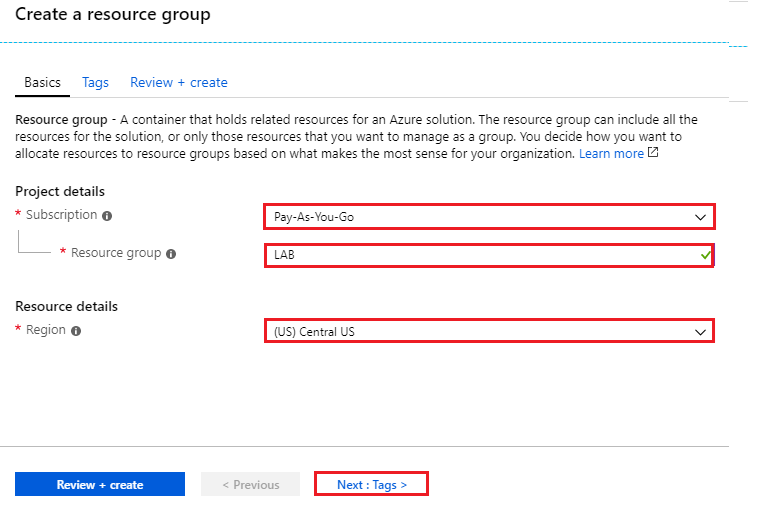
Select your subscription, fill in the name, and select the location where the resource group’s files will reside in Azure. Click Next > Tags to add a tag to your group
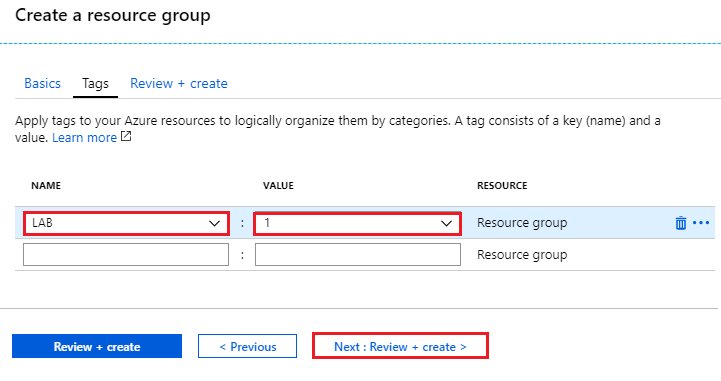
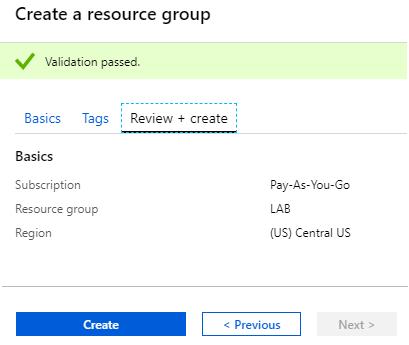
Enter the tag you intend to use and click Review + create.
Review the settings you selected and click Create.
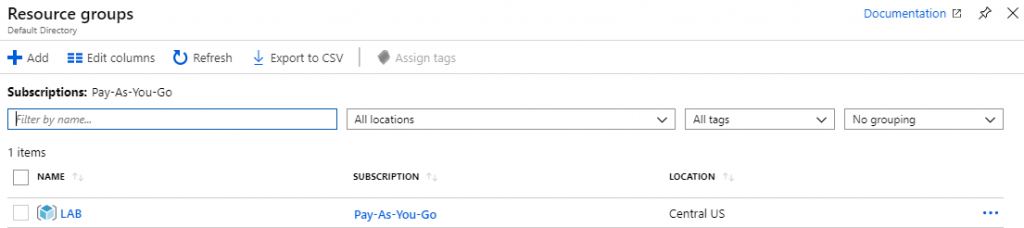
In the screen below, you can verify that the Resource Group was created successfully.
Creating a Resource Group during service provisioning
You can also create a Resource Group during the provisioning of a new service in the Azure portal.
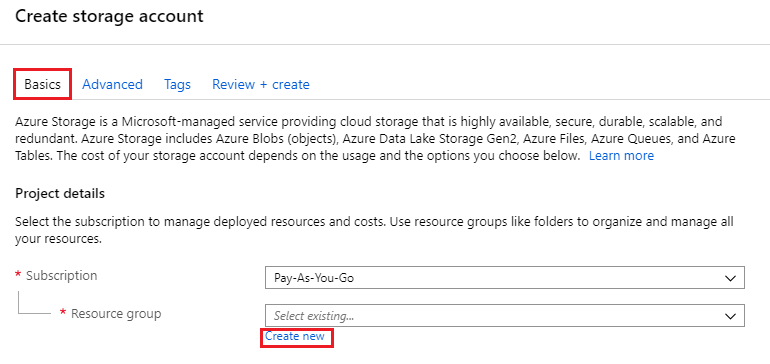
To illustrate this, I’ll create a storage resource and, during this process, select the option to create a new Resource Group for this service
In the service creation step, you can use an existing group, but let’s click the Create new button to demonstrate this method.
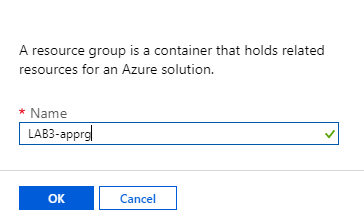
Enter the name of the Resourse Group and click OK.
For illustration purposes only, I created a name for my storage resource. After defining a name and location, click Review + Create.
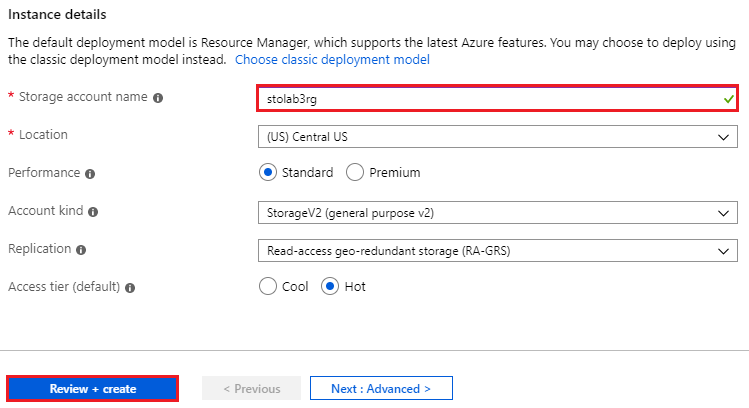
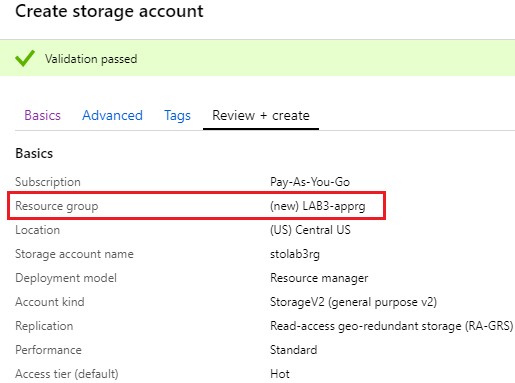
In the resource review, you can see that the new resource group appears with the note (new).
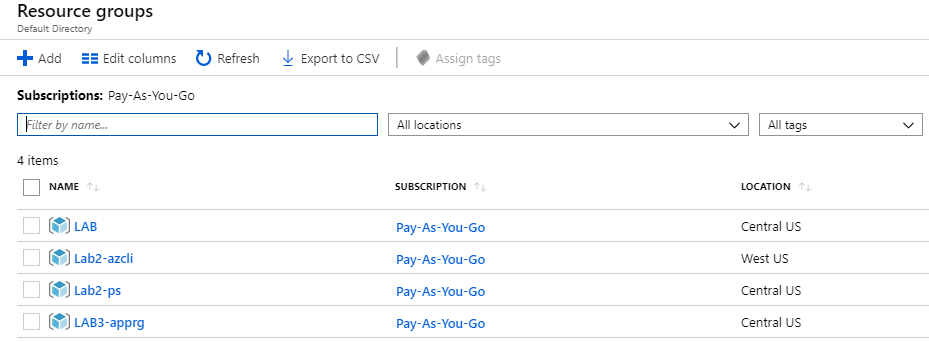
With the Resource Group created, you can view it in the Azure groups panel.
Removing Resource Groups
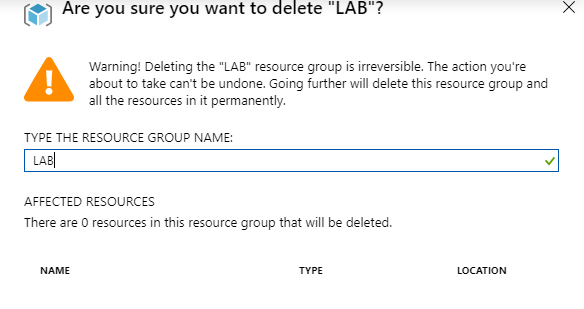
To remove an existing Resource Group, click the group and then the Delete resource group option.
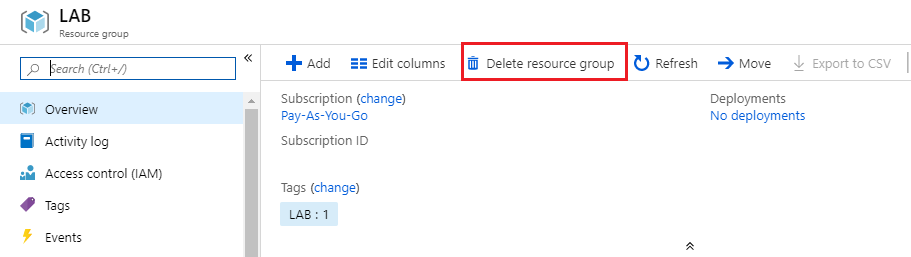
Confirm the Resource Group name and click Delete.
Summary
In this post, we introduced the concept and applications of a Resource Group, what tags are, and how to use them with this resource. We showed how to create an empty Resource Group using the Azure portal and during the creation of a new service.
In the next post, we’ll show how to create Resource Groups using PowerShell and the Azure CLI.
Did you like the post? Like and share it.
[ ]’s
Ulysses Neves

Olá, Ulysses Neves, sou estudante de MultiCloud AWS,Azure,OCI, GCP.
E gostaria de dar meus parabéns pelo artigo publicado aqui, está muito bem explicado e da para entender perfeitamente.Quero expressar, Minha gratidão e respeito por este inspirador trabalho.muito obrigado. Gostei de mais. Sou um apaixonado por tecnologia e gostaria de receber alertas de seus post referentes a estes assuntos cloud.
Olá Arquimedes.
Agradeço seu feedback sobre o conteúdo. A idéia é compartilhar e apoiar outros colegas com um pouco dos desafios que vamos experimentando no dia a dia de trabalho. Você podes acompanhar as publicações através de uma das minhas redes sociais abaixo:
Blog: http://ulyssesneves.com
Facebook: https://www.facebook.com/blogdoulyssesneves
Twitter: https://twitter.com/DasUlysses
Forte abraço e continue firme na jornada. 🙂