
Hello, everyone. In today’s article, we’ll walk you through step by step how to manually register a device in Microsoft Entra ID. As covered in the previous topic, device registration in Microsoft Entra ID benefits BYOD scenarios – Bring Your Own Device – and mobile devices, such as smartphones, tablets, etc.
Registering a Windows 10 device in Microsoft Entra ID
We’ll explain how to manually register a Windows 10 device in Microsoft Entra ID.
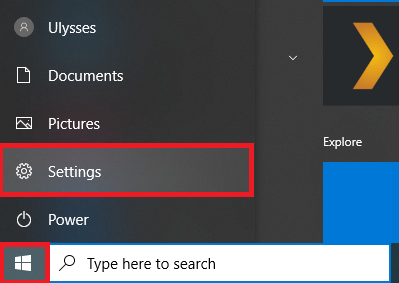
1 – Click Start in the Windows menu and select Settings.
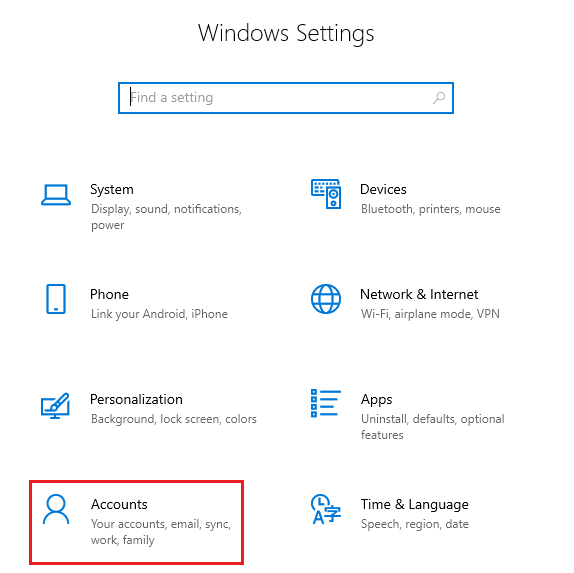
2 – Select the Accounts option.
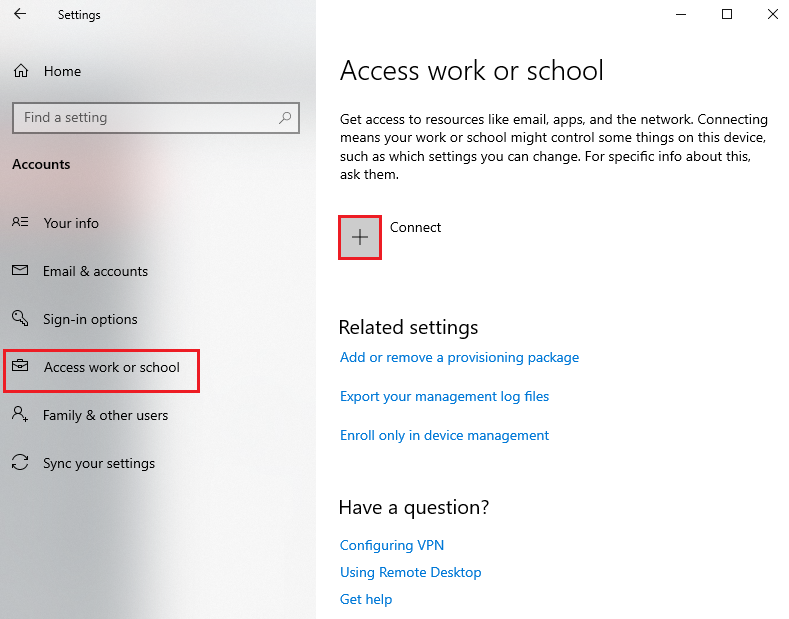
3 – Click Access work or school and select the Connect option.
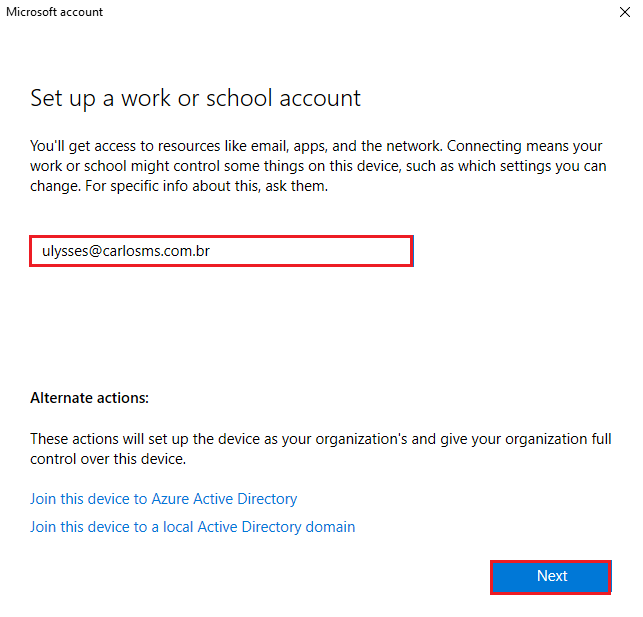
4 – Sign in with your account registered in Microsoft Entra ID/Office 365 and click Next.
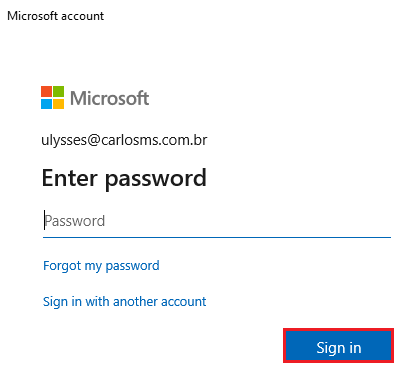
5 – Enter your account password.
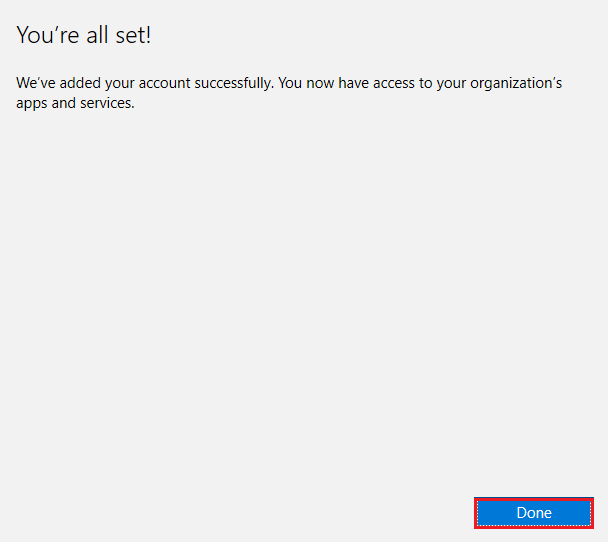
6 – Once the device is registered, you’ll receive the message below. Click Done.
Verifying the device registration in Microsoft Entra ID
To verify the device registration in Microsoft Entra ID, click this link.
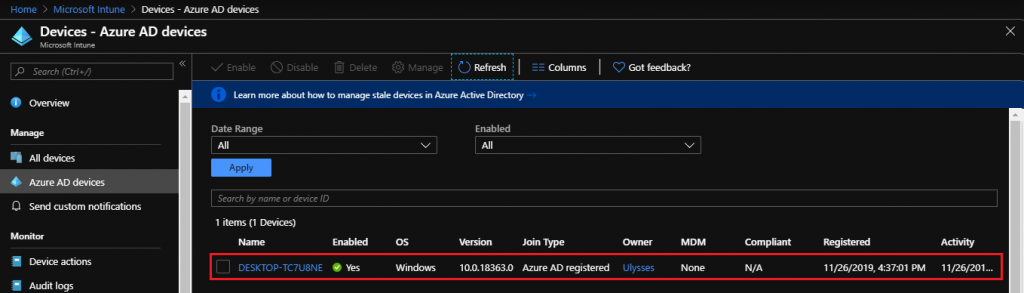
By accessing the menu of existing devices in Microsoft Entra ID, we can identify the desktop we just registered.
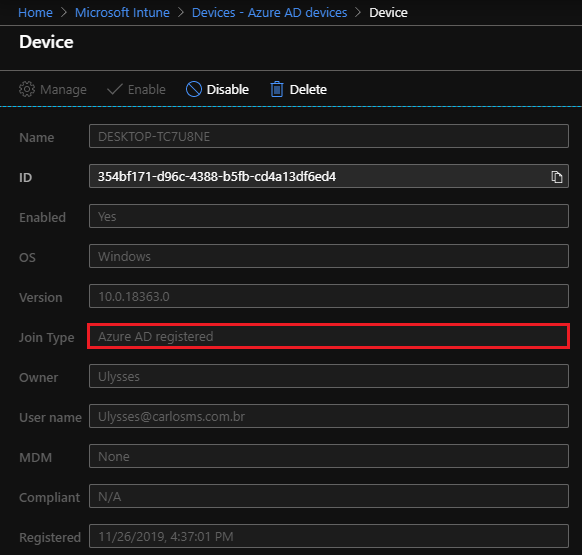
By clicking the device name, you can get more information about it.
In the field Join Type we identify the type of join performed for the device in Azure, in this case Azure AD registred.
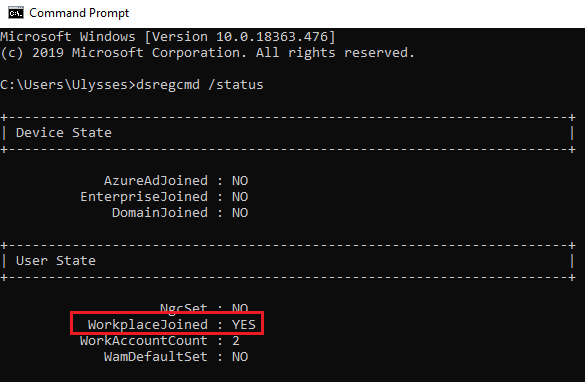
It is also possible to identify the device join status in Microsoft Entra ID by running the command below in the Windows prompt:
dsregcmd /status
Summary
In today’s article, we explained step by step how to register a Windows 10 device in Microsoft Entra ID. This scenario is more common in BYOD devices, where registration makes it easier to use personal equipment to access corporate applications while ensuring security and a better sign-in experience.
In upcoming articles, we’ll explain how to join a device directly to Microsoft Entra ID (Microsoft Entra joined) and the scenarios where this solution can be applied.
I hope this content has helped enrich your knowledge of Azure.
Did you like the post? Like and share it. 🙂
If you have any suggestions or comments, let us know.
[ ]’s
Ulysses Neves
