Hello everyone. For those who work with AD FS (Active Directory Federation Services), we are starting a series of articles with tips and tutorials related to this service. In today’s article, we will show how to make some customizations to the authentication portal.
To make the changes below, you must already have an AD FS 2016 environment. We will make the following changes to our portal:
- Add the company logo.
- Change the illustration.
- Change the company name.
- Include an informational message for users.
- Add the support link.
- Add the access policy link.
- Add the company home page link.
Adding a logo to the portal
We will start the changes by adding the company logo to the portal. To do this, open PowerShell in administrator mode on the AD FS server and run the command below:
Set-AdfsWebTheme -TargetName default -Logo @{path="c:\logo.png"}
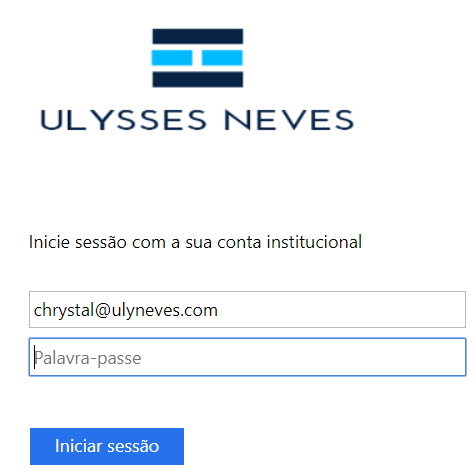
The recommended image size is 260×35 at 96 DPI and up to 10 KB. In the image below, you can see that the command was executed successfully:

We can see the logo when we open the AD FS portal sign-in page:
Changing the portal illustration
We will change the image displayed in the portal using the command below:
Set-AdfsWebTheme -TargetName default -Illustration @{path="c:\illustration.jpg"}
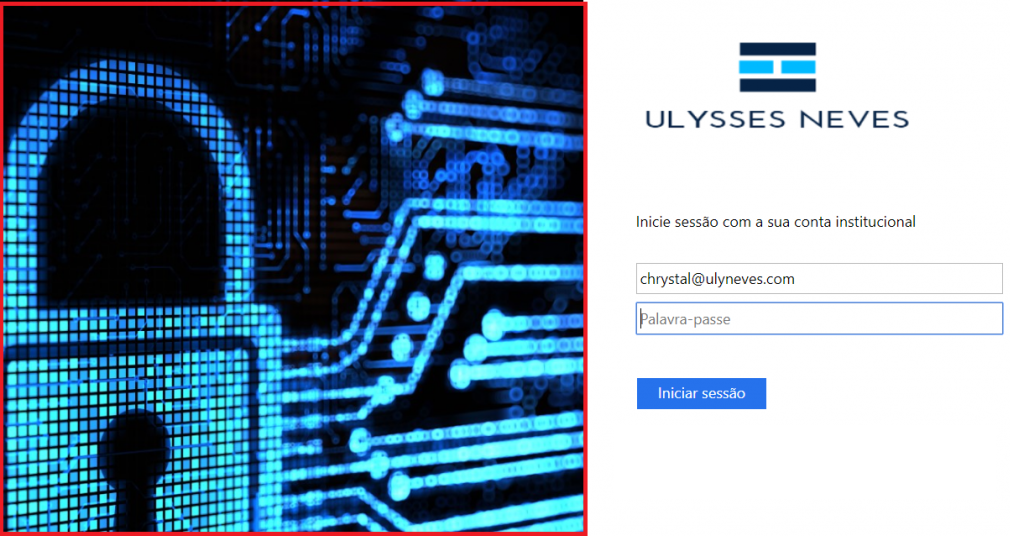
Because we used an image larger than 200 KB, a message is displayed indicating the recommended image size. The recommended image size is 1420×1080 pixels at 96 DPI and up to 200 KB.

We can see in the image below that the image was changed in the portal.
Changing the company name in the portal
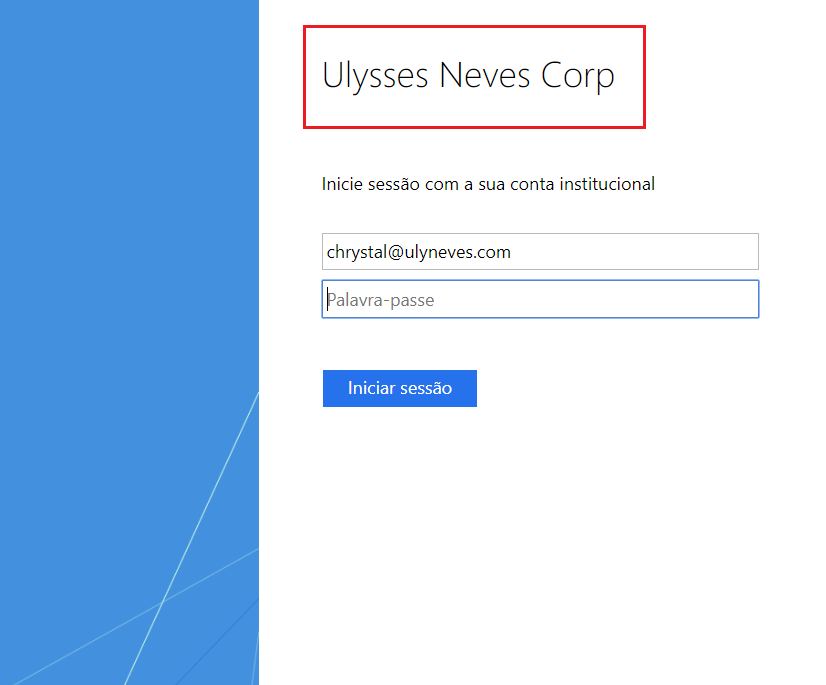
If you do not want to use the company logo, you can use only the name with the following command:
Set-AdfsGlobalWebContent –CompanyName "Ulysses Neves Corp"

We can see in the portal that the company name is now available.
Changing user access information in the portal
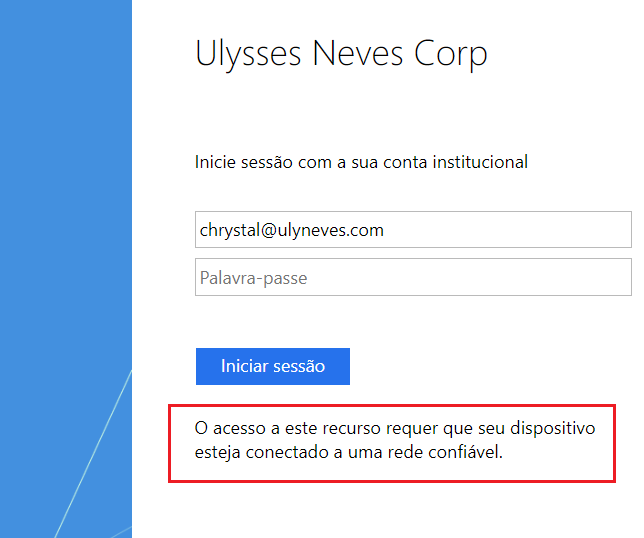
We will include a message for users. To do this, run the command below:
Set-AdfsGlobalWebContent -SignInPageDescriptionText "O acesso a este recurso requer que seu dispositivo esteja conectado a uma rede confiável."

We can see that the message is displayed on the sign-in page.
Adding the Helpdesk link to the portal
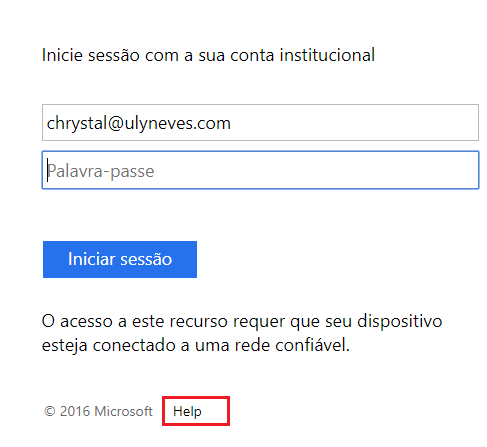
You can add a link to the helpdesk portal in case the user needs to open a support request. To add this link, use the command below:
Set-AdfsGlobalWebContent -HelpDeskLink https://adfs.ulyneves.com/help/ -HelpDeskLinkText Help

The support request link is made available in the page footer.
Adding the link to the privacy policy
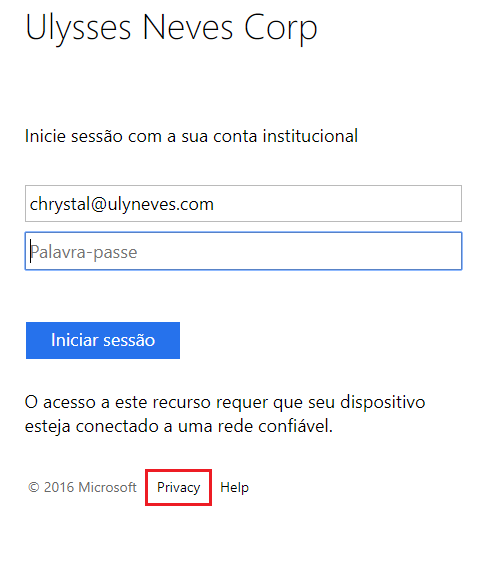
If you want to include a link to the portal’s privacy policy, use the following command:
Set-AdfsGlobalWebContent -PrivacyLink https://adfs.ulyneves.com/privacy/ -PrivacyLinkText Privacy

In the portal, you can see the privacy policy link next to the support request link.
Adding the link to the company’s home page
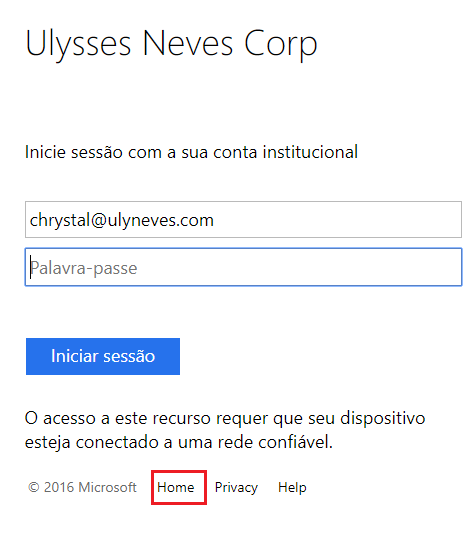
Just as we added the support request and privacy policy links, you can also add the company portal link to the page footer. To do this, run the command below:
Set-AdfsGlobalWebContent -HomeLink https://adfs.ulyneves.com/home/ -HomeLinkText Home

On the portal, we can see the link available to users.
If you want to explore other customizations in the portal, access this link.
Summary
In today’s article, we demonstrated how to customize the AD FS authentication portal. These portal changes make it possible to provide a differentiated experience for user access to applications where AD FS is the identity provider.
I hope this content has helped enrich your knowledge of AD FS.
Did you like the post? Like and share it. 🙂
If you have any suggestions or observations, leave a comment.
Best regards,
Ulysses Neves
