Hello everyone. In today’s article I’ll explain step by step how to create an app service on Azure, configure the application on a custom domain, and enable SSL for secure access using HTTPS.
What is an Azure App Service?
Azure App Service allows you to publish and scale applications on Azure using containers on Windows or Linux. You can work with .NET, .NET Core, Node.js, Java, Python, or PHP applications.
In this article, we will perform the following activities:
- Create an app service on Azure.
- Configure the application page.
- Configure the custom domain on the app service.
- Apply the SSL certificate for secure access using HTTPS.
- Validate access to the published application.
Creating an App Service on Azure
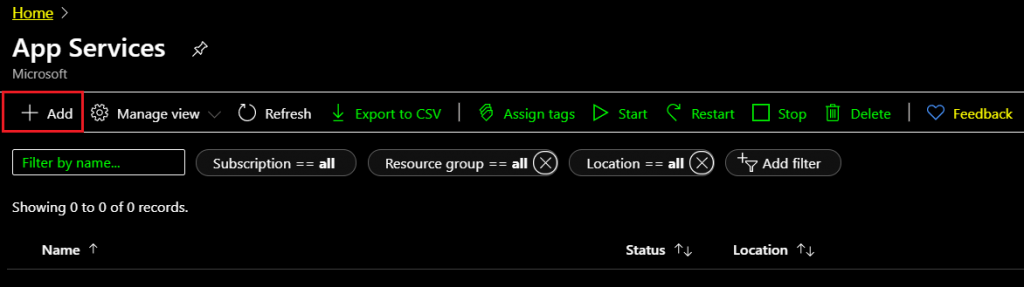
Let’s start by creating the app service on Azure. Access the Azure App Service menu.
Click Add.
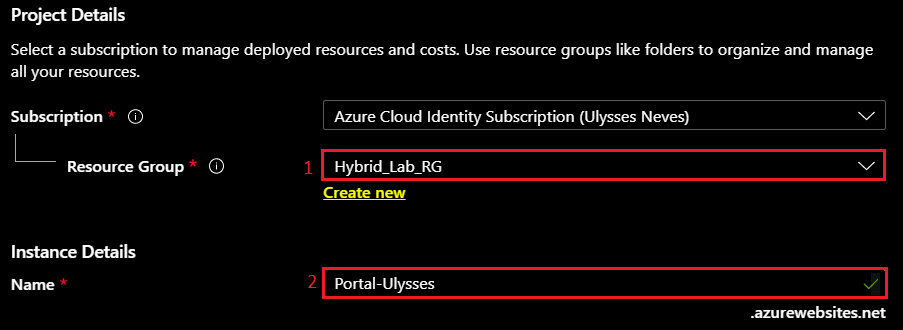
Follow the steps below to start creating the application:
1 – Select the resource group you want to use for the application.
2 – Create a name for the application on Azure.
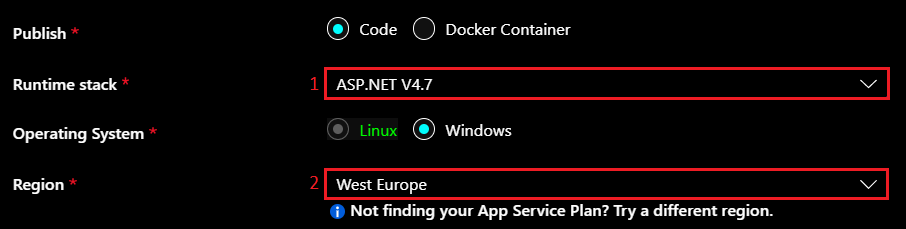
Follow the steps below to configure the platform and region where the application will be hosted:
1 – Select the platform to be used for the application.
2 – Select the region where the application will be hosted. Keep in mind that some regions won’t have all platforms available.
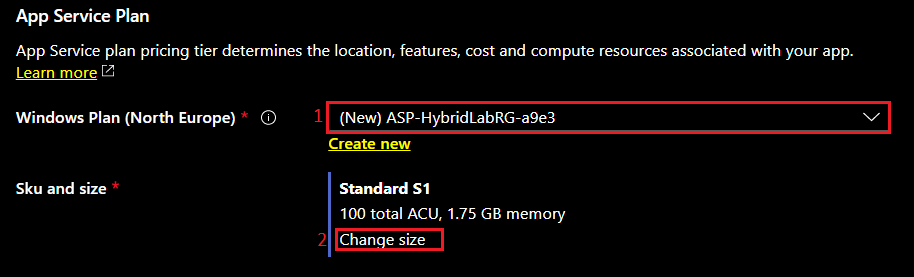
Follow the steps below to configure the service plan:
1 – Let’s select the default plan offered by the North Europe region.
2 – Let’s change the application capacity to support custom domains.
To support custom domains, we need to select at least the S1 plan from the Production menu as shown below:
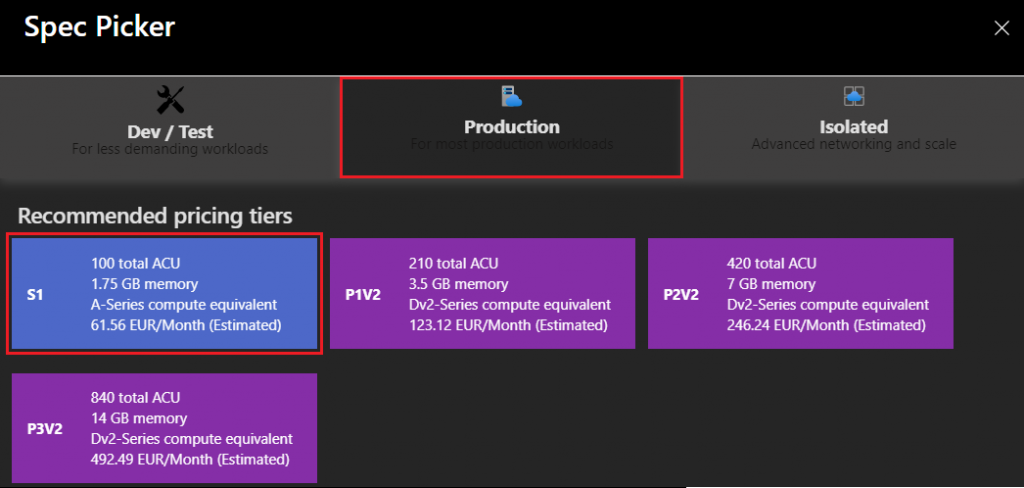
Click Apply.
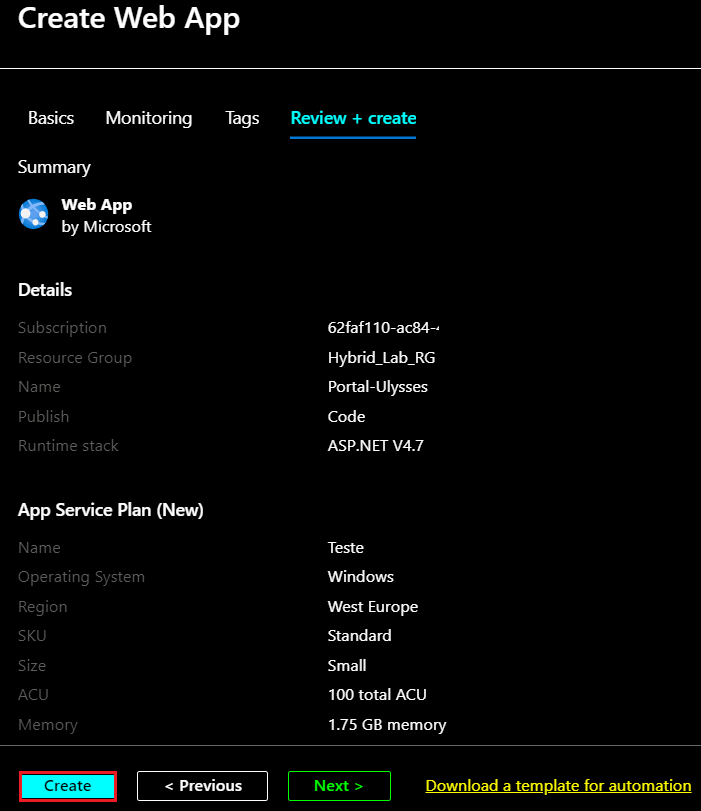
Let’s keep the remaining settings and click Review + Create.
Click Create once the configuration validations are OK.
Configuring the application page
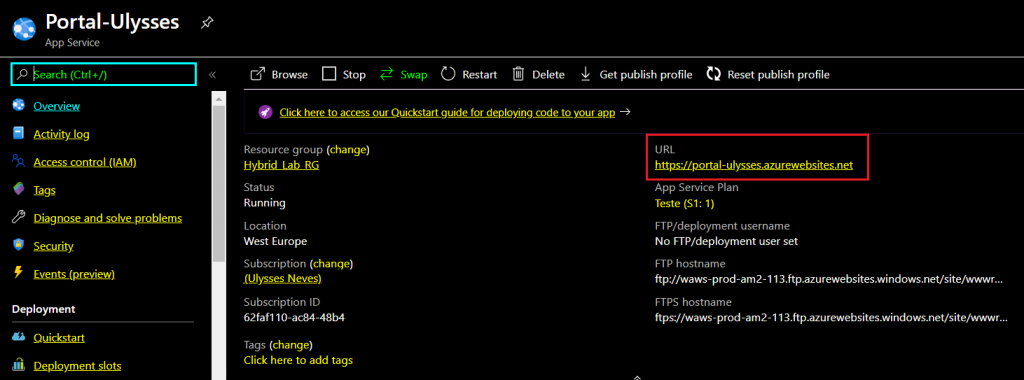
Once the application creation is complete, let’s view the settings by clicking the name of the created application.
We can see that the application already supports HTTPS using the default Azure domain: azurewebsites.net.
For this example, I created a simple HTML page. Let’s publish the page by following the steps below:
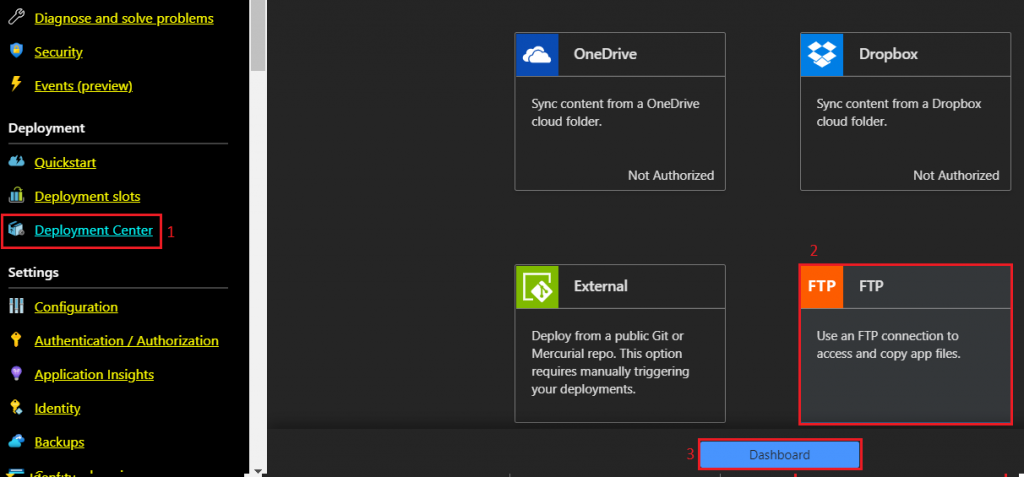
1 – Select Deployment Center in the Deployment menu.
2 – Select FTP to publish the page to Azure.
3 – Let’s click Dashboard to get the FTP access information.
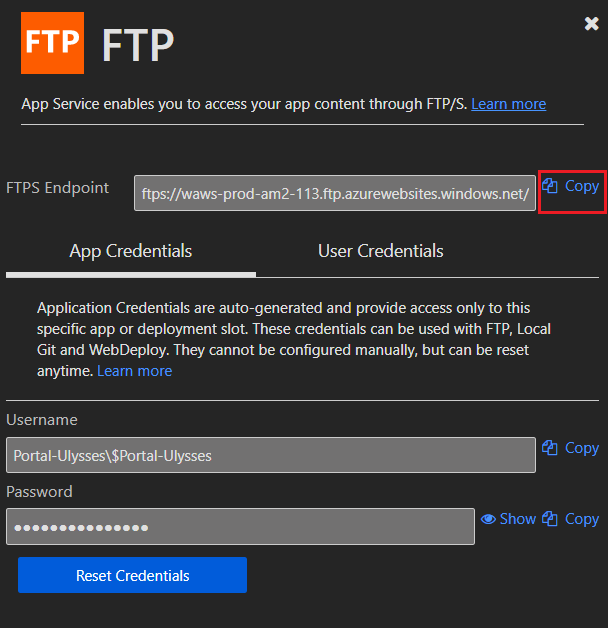
Copy the FTPS URL by clicking Copy.
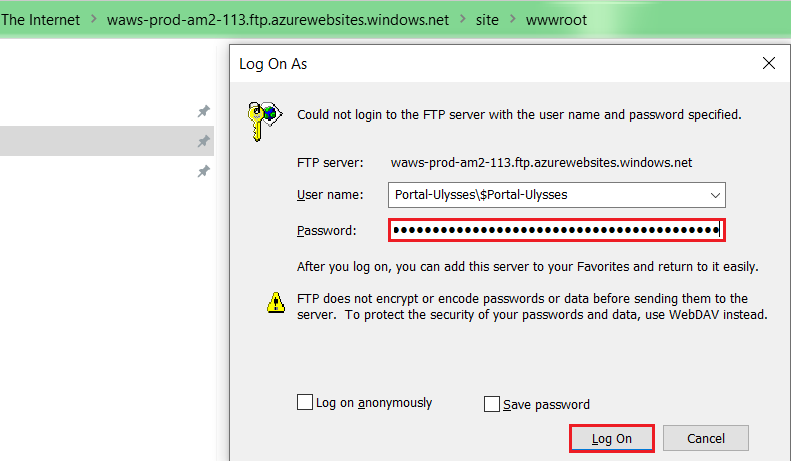
Paste the copied URL into Windows Explorer, enter the password provided on the previous screen, and click Log On.
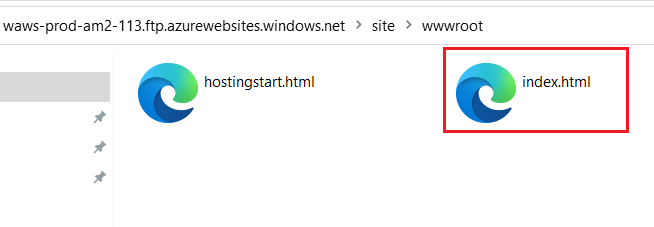
Now let’s copy the created page to the wwwroot folder.
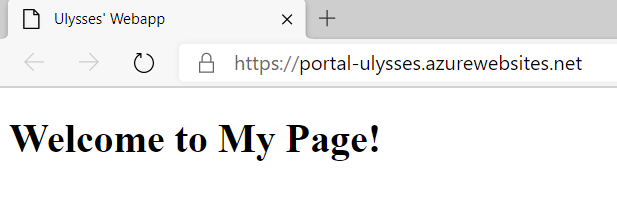
Now let’s validate access to the published page using the URL: https://portal-ulysses.azurewebsites.net available in the application settings.
Configuring the custom domain on the application
In a production environment, it’s important for the company’s domain to be used to access the application. To achieve this, we have the Custom domains option.
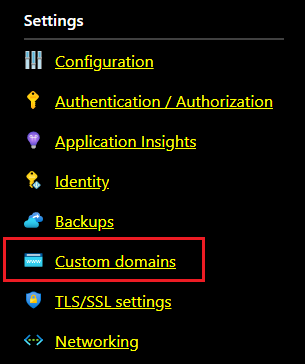
Let’s change the domain in the application access URL by selecting the Custom domains menu.
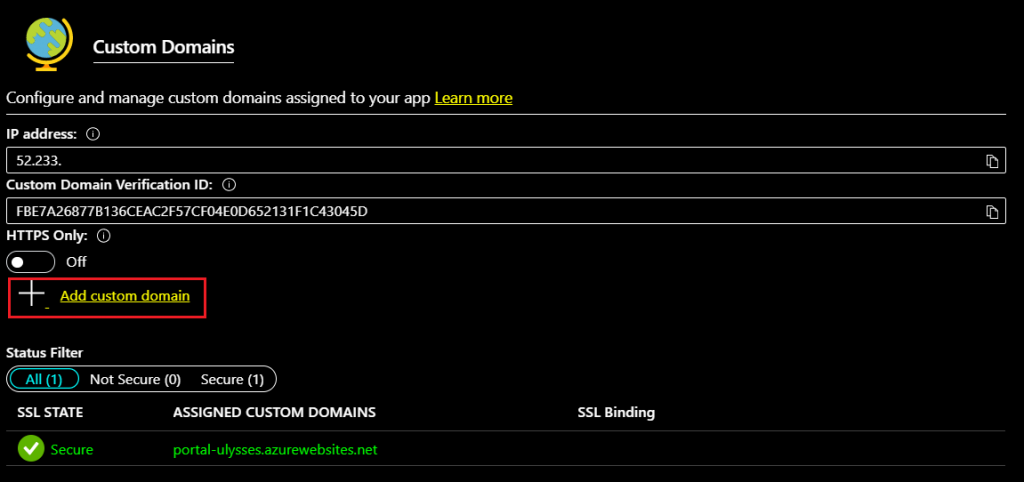
Select the Add custom domain option.
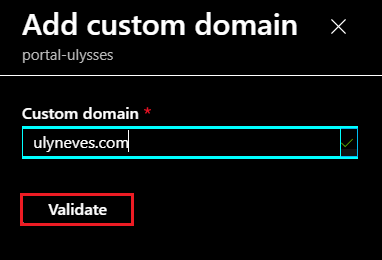
Enter the custom domain in the Custom domain menu and click Validate.
We can see that it’s necessary to confirm ownership of the domain to proceed with the configuration.
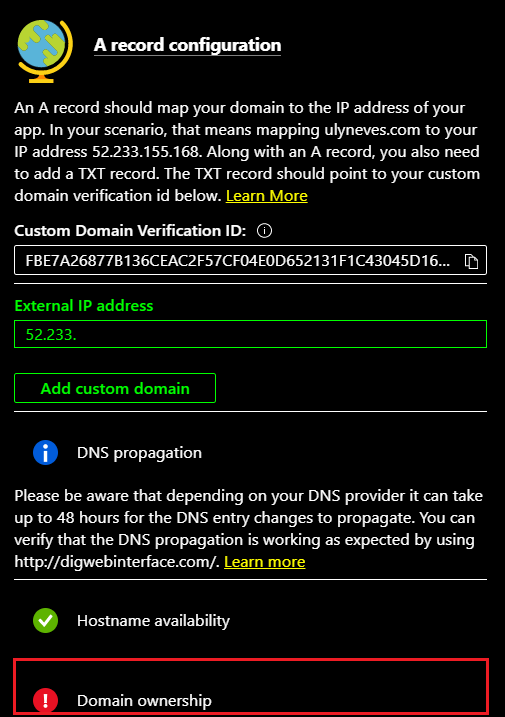
Let’s create, at the service where the domain was registered, the records that allow us to confirm ownership of the domain ulyneves.com as instructed above. In our case, we’ll publish this on GoDaddy’s DNS.
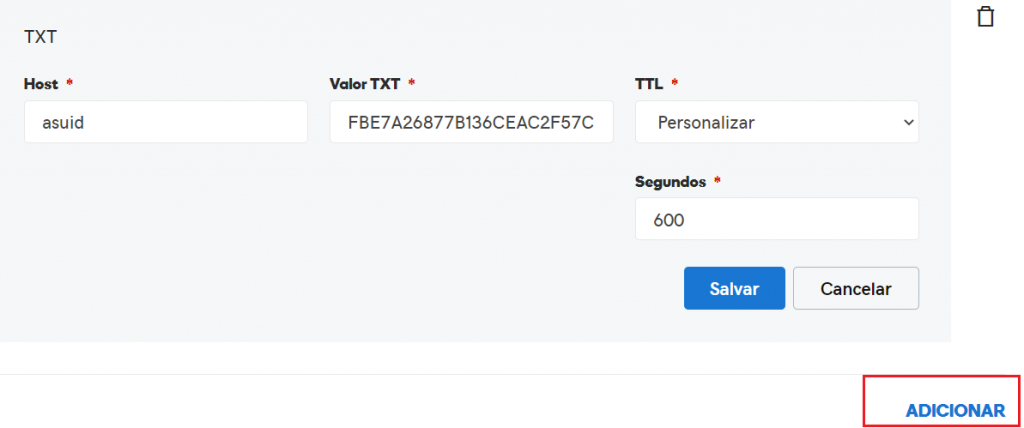
As shown below, we’ll create a TXT-type record with the code generated by the application on Azure.
With the correct settings, let’s click Adicionar.
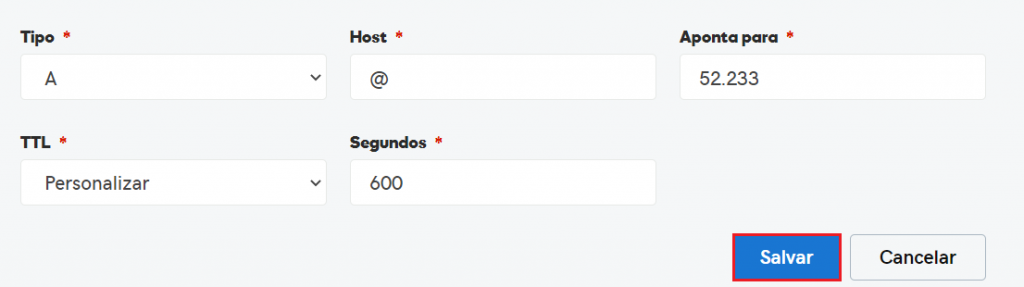
Let’s also add an A-type record pointing to the IP of the server where the application is hosted on Azure.
Let’s click Salvar.
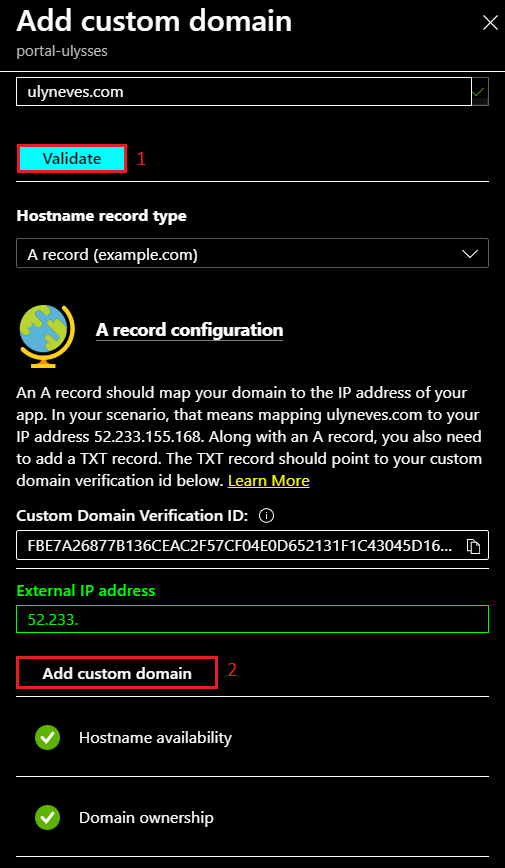
Once the DNS record propagation is complete, let’s follow the steps below to publish the custom domain:
1 – Click Validate again.
2 – Click Add custom domain.
We can see, when accessing the created application’s settings again, that the custom domain is now being used, but still on http.

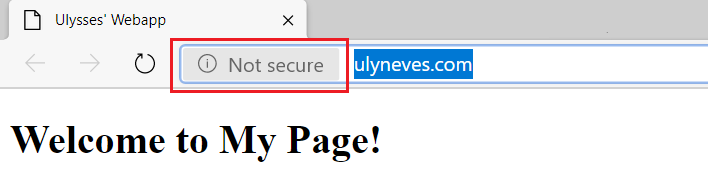
When accessing the new (URL) we see the “not secure” site message.
Adding the SSL certificate to the application
To ensure security when accessing the configured application, we’ll apply the certificate generated by Certisign for the domain ulyneves.com to the application, in order to enable access using https.
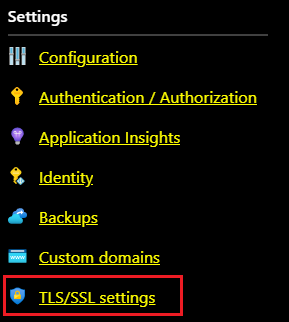
With the certificate in hand, select the TLS/SSL settings menu.
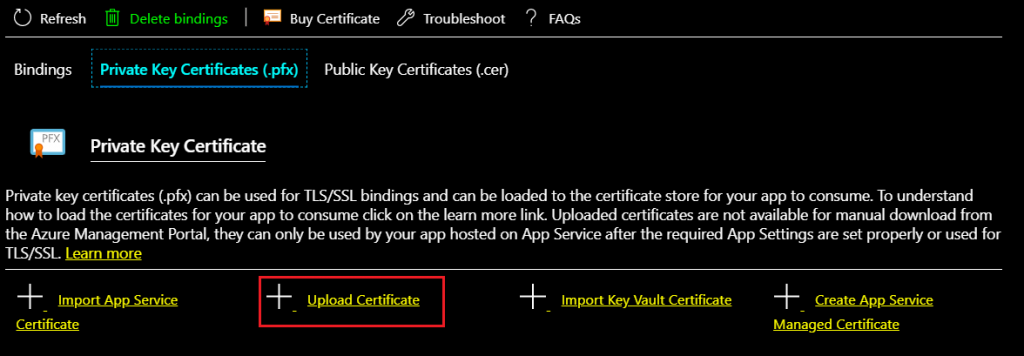
In the Private Key Certificates (pfx) menu, click Upload Certificate.
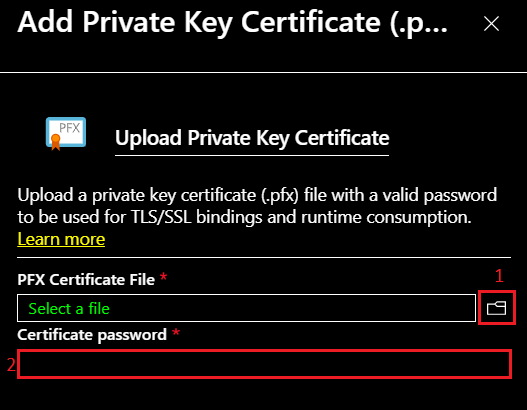
Perform the activities below to add the custom domain’s SSL certificate:
1 – Select the .pfx type certificate
2 – Enter the certificate password.
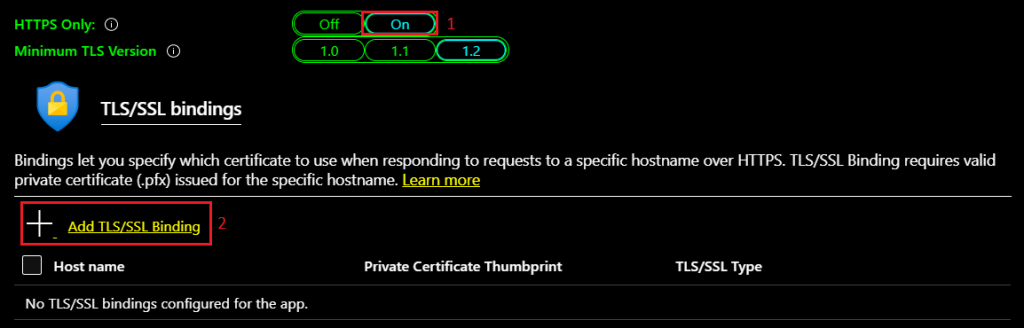
Let’s enable the http to https redirection option and activate the PFX certificate added in the previous step:
1 – In the HTTPS Only option, select On.
2 – In the TLS/SSL bindings option, click Add TLS/SSL Binding.
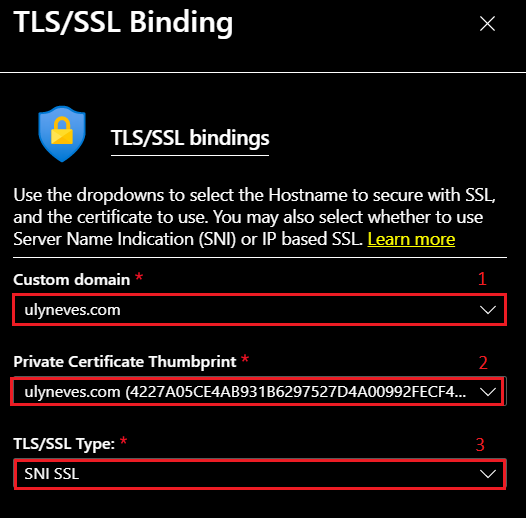
Follow the steps below:
1 – Select the custom domain configured on the application.
2 – Select the SSL certificate for the selected domain.
3 – Let’s use the SNI SSL type, which allows multiple TLS/SSL certificates for multiple domains using the same IP address.
Accessing the application after configuring SSL
With the configuration complete, we can see the URL with HTTPS and the custom domain in the created application’s settings.

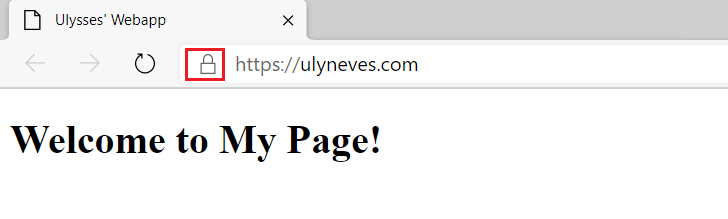
Let’s validate the settings made in this article by accessing the URL https://ulyneves.com.
Summary
In today’s article, we demonstrated how to create an application on Azure App Service, configure a custom domain for use with this application, and an SSL certificate for HTTPS access.
I hope this content has contributed to enriching your knowledge of Azure App Services.
Did you like the post? Like and share it. 🙂
If you have any suggestions or comments, let us know.
[ ]’s
Ulysses Neves
